Work shifts > Work shift planner
The following explains how to create a work shift auction and what kind of functions an auction has. Work shift auction means that it is possible to create open work shifts for employees who meet the desired criteria. The employees get a notification of a new open shift and can accept shifts which are the most suitable for them.
There is also an instructional video on how to create a new work shift auction: Work shift auction - Tuntinetti.
Preparing to use work shift auction
Activating work shift auction
Work shift auction must be activated in the Tuntinetti's paid features, in the Basic settings-tab. This can be done by checking the "Open shift auction via SMS/E-mail" check-box in the feature list.

Preparations that need to be done in order to use work shift auction
- Make sure that wanted amount of months have been entered in the "Work shifts open"-field in the Units-tab's Work shift settings-section.
- Make sure that permanent employees have the authorization to select planned work shifts by activating "The permanent employers can confirm/and select planned shifts" in the Work time settings-section in the Projects-tab.
- Now permanent employees can see the project's open work shifts and select shifts that they want in the Booking calendar-tab.
Creating a new order
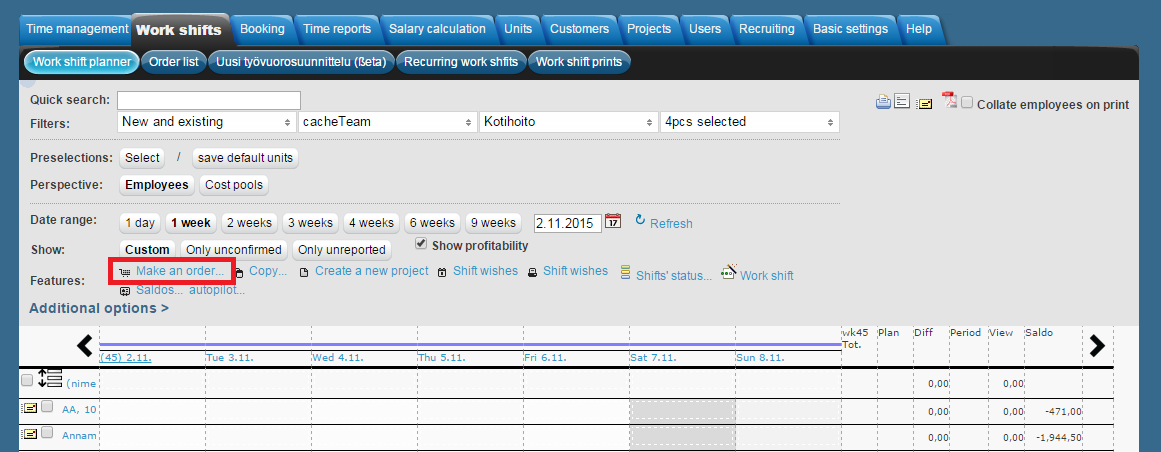
A new Work shift auction can be created by clicking the "Make an order"-button in the Work shift planner's features.
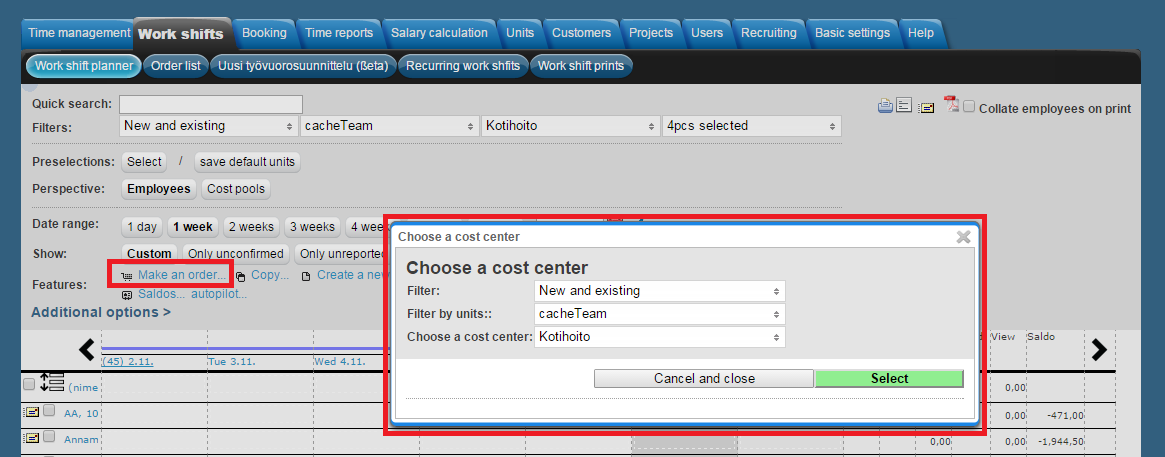
Choosing a cost center
The first step in creating a new auction is to choose the cost center. The drop-down list of the cost centers can be filtered by the state the cost center and by units. The units can be searched with keywords and multiple units can be selected at the same time in the drop-down list with check-buttons. When the correct unit is selected you can choose the desired cost center and advance by clicking "Select".
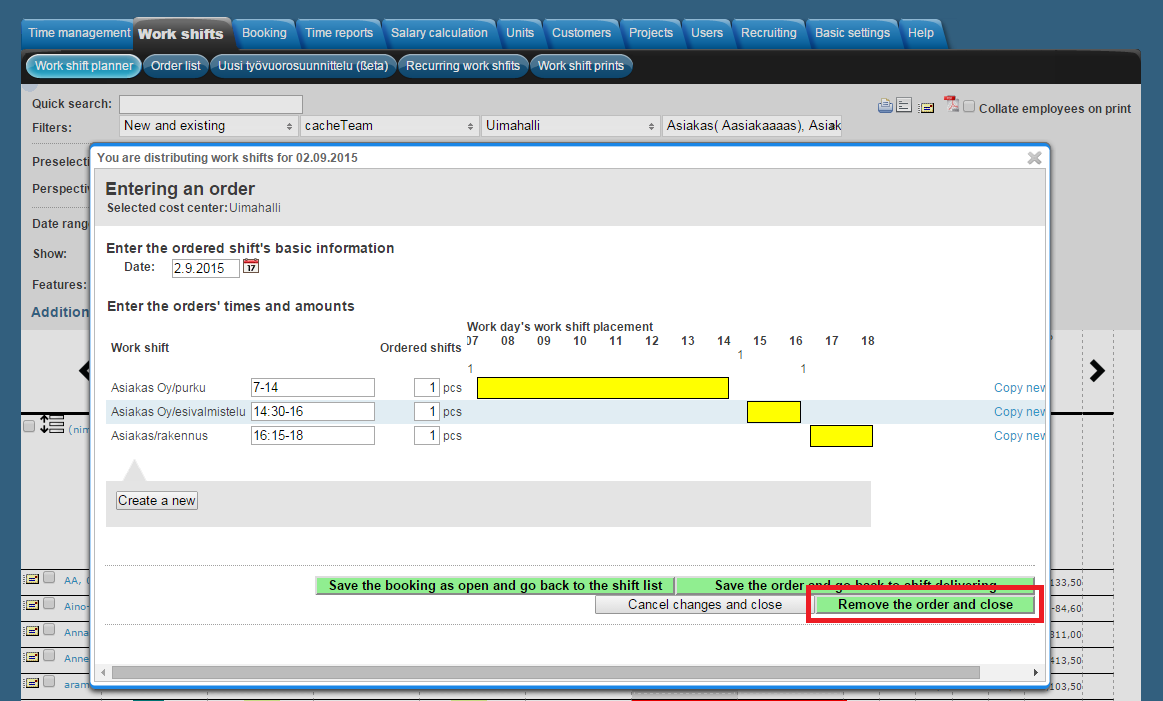
Entering an order
In the "Entering an order" window you can specify the cost center if necessary. Obligatory fields are the Date of the new order, Workshift and the quantity of the new orders.
- In the Date field you must enter the date of the new order. It can be selected in a calendar view by clicking the calendar icon next to the field.
In the Workshift field you must enter the time when the shift is. For example 8-16.
If you have more than one task, you can assign different times to every task by clicking the "Each task can accept orders at different times" check-box active. This creates a new workshift field for every task that can be used to assign different times.The number of new shifts is entered in "Ordered shifts".
If you have more than one task, each task can be assigned the desired amount of ordered shifts.
These choices are only available if there are multiple tasks:
The tasks where new shifts are wanted must be active. That can be made by checking the "Akt." check-boxes if they are not already checked.
It is possible to add notes to billing in the "Billing notes" field.
"Copy new"-button copies the task to a new task which you can name and modify to fit your needs.
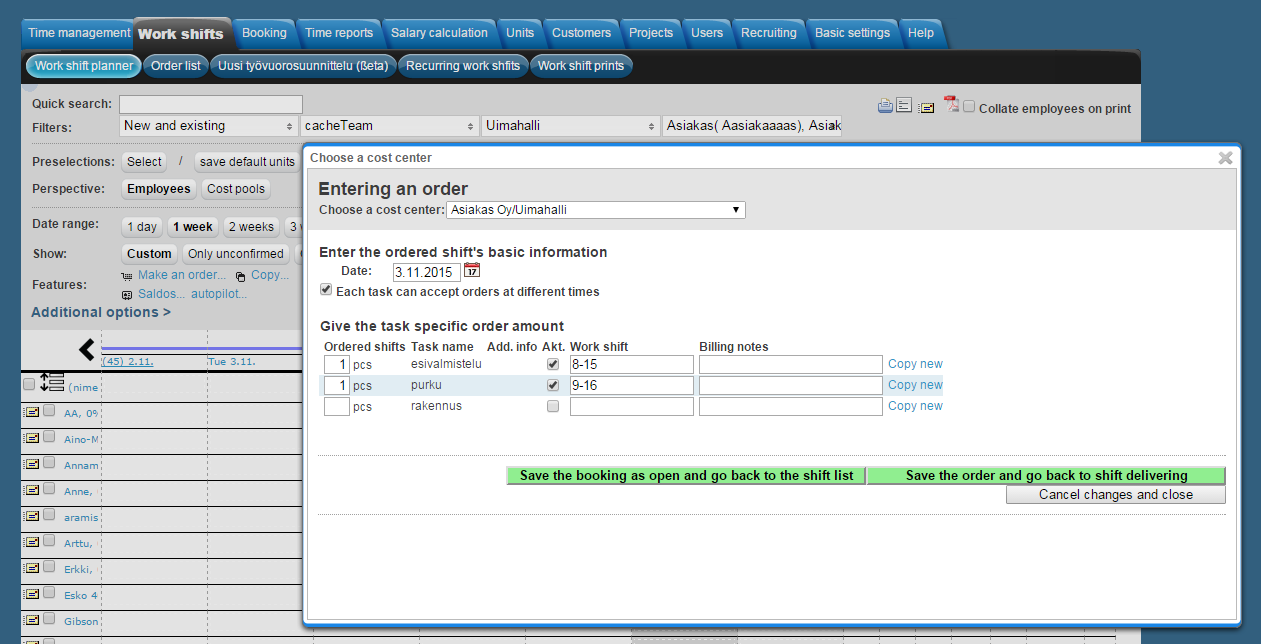
When these choices are selected and the new order entered you choose to save the booking as open or to save the order and continue to shift delivering.
Offering of shifts
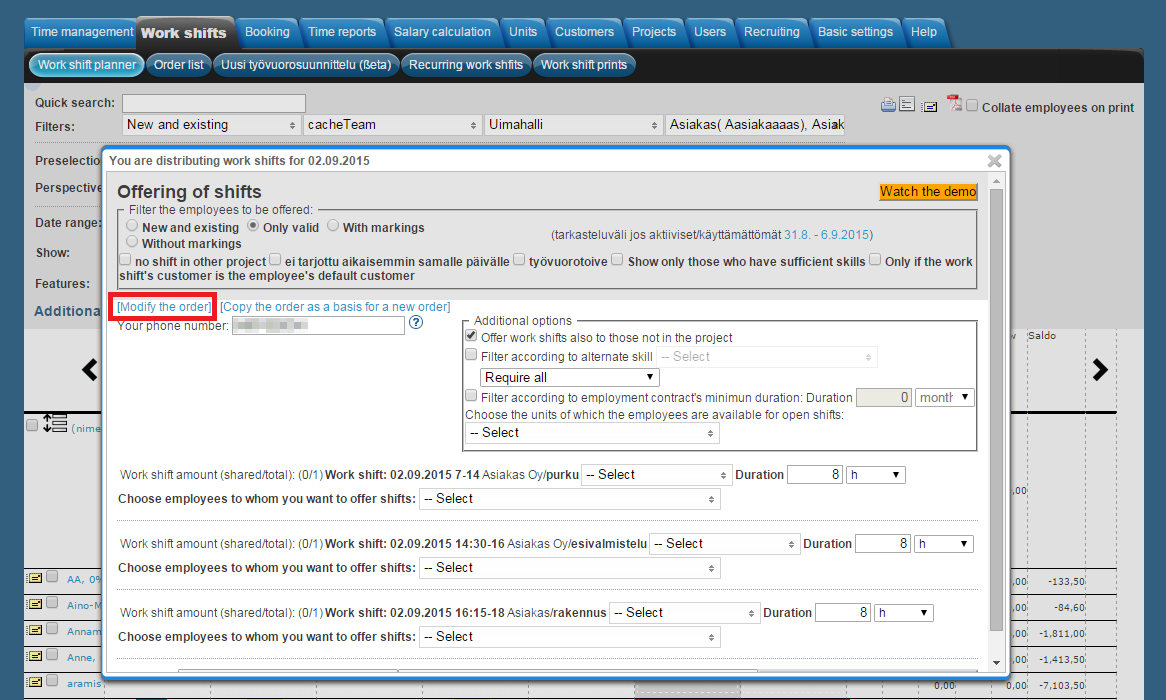
In the offering of shifts window the new order can be offered to certain employees. For example it can be offered to those who have sufficient skills to do the job.
In this window you should check that your phone number is correct because a confirmation message of new auctions is sent to that number. You can choose to receive a notification of distributed shifts or to be notified of the non distributed shifts.
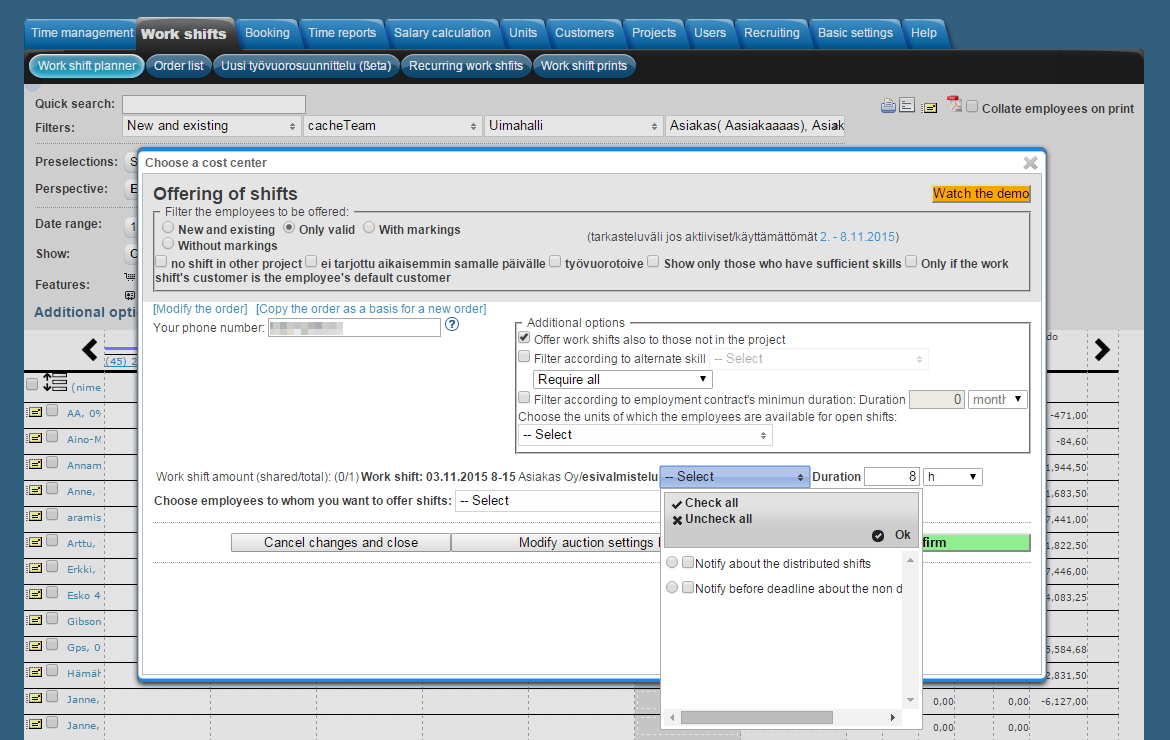
Filtering employees
You can filter the employees that are offered in many ways:
- If the employee has no shift in other project
- If there are no other shifts offered
- If it is a shift that the employee wants
- If the customer is the employee's default customer
- If the employee has sufficient skills
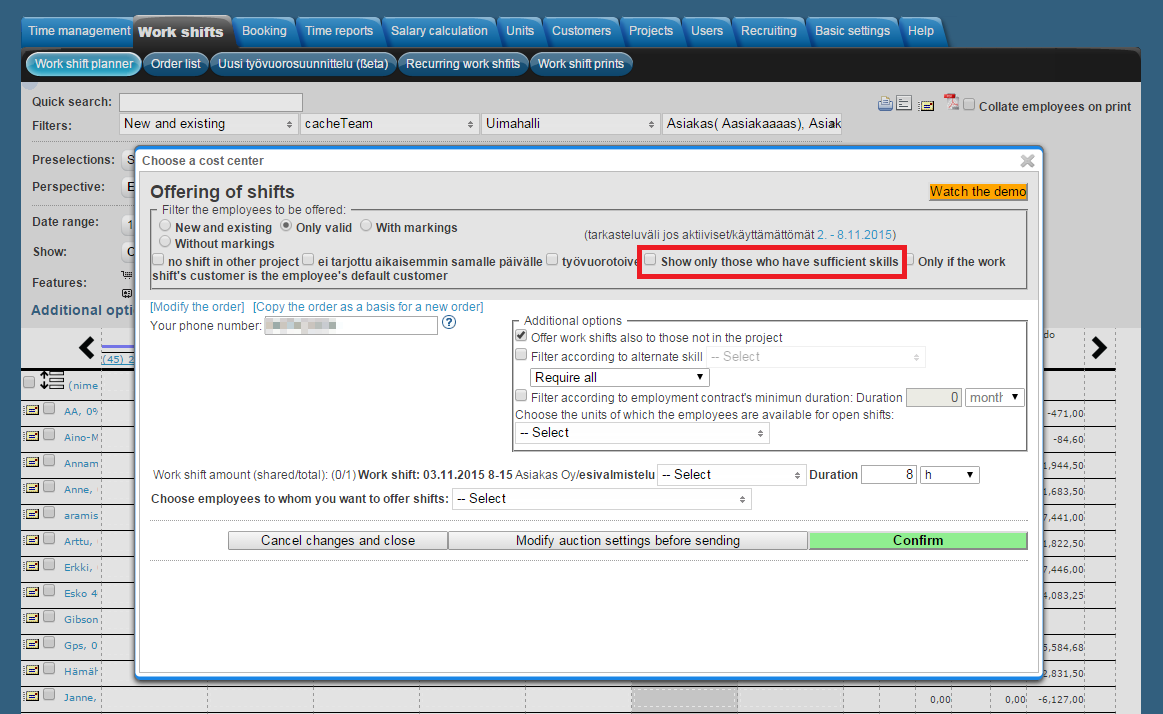
Additional options
In additional options there are more filtering options. There it is also possible to offer shifts to those employees that are not in the project.
Selecting employees
The wanted employees can be selected from a drop-down list. With check-box you can choose multiple employees at the same time. The radio button selects only one and discards any other choices.
When you have the employees selected their options appear in the lower area of the window.
- "Confirm the shift" confirms that the employee gets the shift. This can be used if it is known that the employee will be available.
- There are three ways to inform employees of a new work shift. Via email, via sms or other. You can choose with each employee how the opening of a new shift will be informed.
- Other way means that the employee won't be informed through Tuntinetti but the new shift appears in the employee's calendar as an open shift.
- Via email means that Tuntinetti sends an automated message to the employee's email and the new shift appears in the employee's calendar as an open shift.
- Via sms means that Tuntinetti sends an automated message to the employee's cell phone. If the employee wants the shift he or she must confirm it by sending a confirmation message back. If via sms is chosen you should check that the cell phone numbers are correct.
- It is possible to remove added employees from the list by clicking the "Remove"-button.
Auction settings
In the auction setting you can modify the sms offer, the sms confirmation message and the email offer which are sent to the employees. To get to the auction setting click "Modify auction settings before sending".
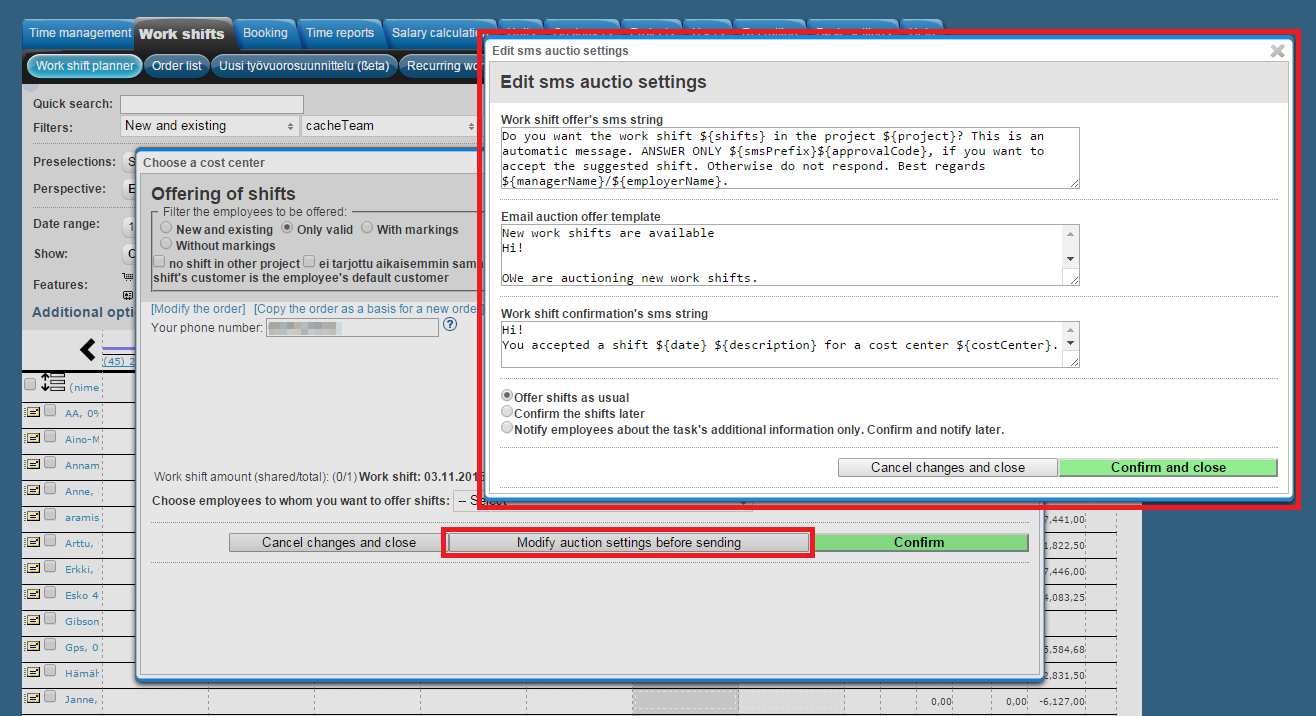
When changing the sms messages you have to be careful to keep in a working form. These messages include tags that are used to replace dates and names so the messages are up to date. You can get more information by contacting Tuntinetti support. E-mail: tuki@tuntinetti.fi, phone: +358-(0)9-6898 8221 or making a contact request in Tuntinetti's Help section.
Examining the Work shift planner
When new shifts are auctioned they appear in the work shift planner. All shifts have different colors that tell the states of the shifts. Open, auctioned, confirmed and so forth. The descriptions of the colors can be found in the page's additional options that can be entered by clicking "Additional options". With the color coding the work shift planner can easily see which employees are still available. You can see the detailed information of a single shift by hovering your mouse over the shift.
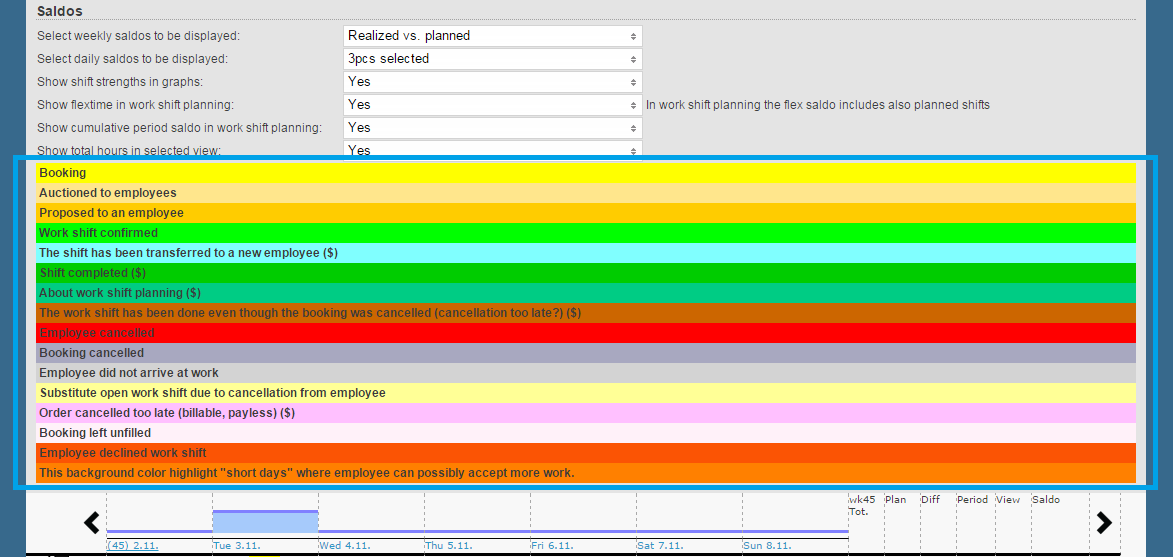
When employees accept shifts the color update automatically so the work shift planner is up to date.
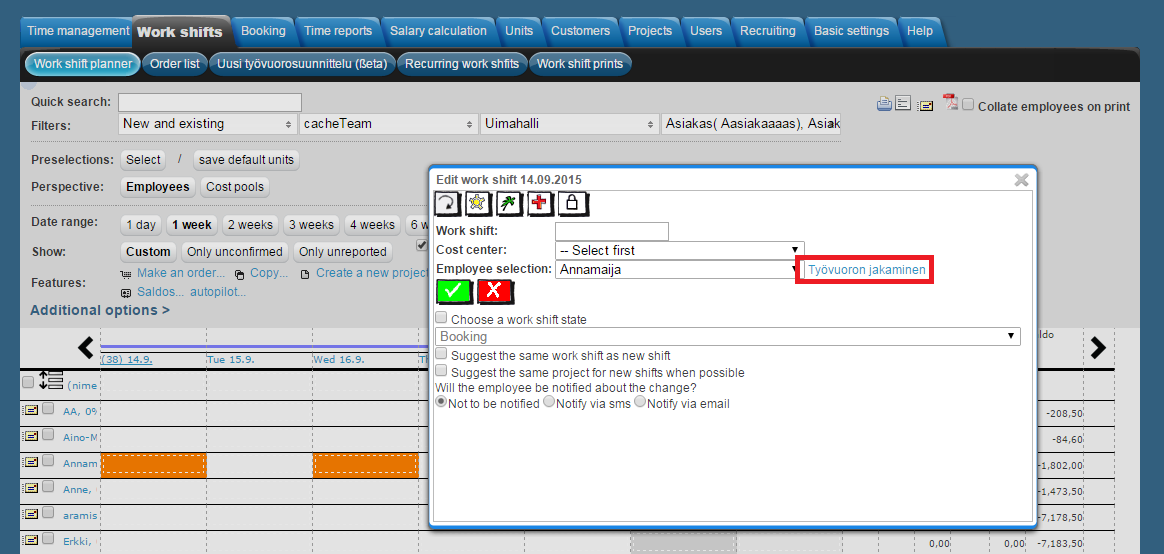
Re-offering a shift
If you want to offer already auctioned shift to different employees you need to get to the offering of shifts view. That can be done by clicking the shift and then clicking "Työvuoron jakaminen".
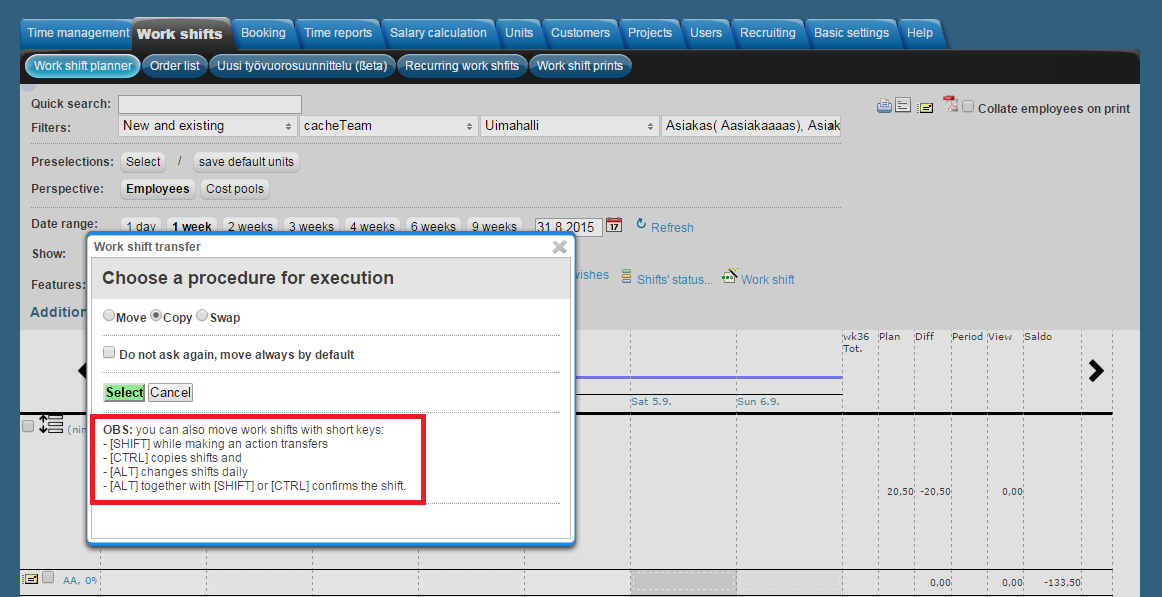
Copying and moving a shift
Work shifts can copied or moved by dragging them to the wanted day and selecting a function from the procedure window that opens up. You can do this also with hotkeys which are explained in the procedure window.
Removing a shift
To remove a shift you must go to the "Entering an order" window where the basic settings of the shift can be modified.
First you must enter the offering window by clicking the shift in the work shift planner. In the offering window click "Modify the order".
Now you can remove the shift by clicking "Remove the order and close".
Confirming work shifts
When an employee confirms a work shift it will be automatically updated as confirmed to the employee. This way supervisors can easily see the work shifts that are confirmed and the ones that are still open.
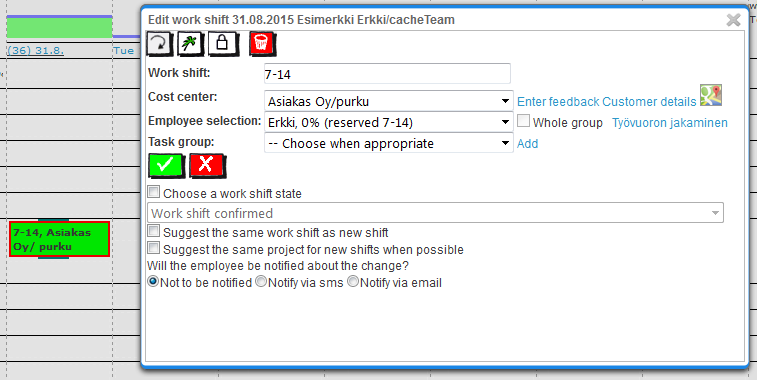
If an employee wants to confirm a work shift with a phone call, email or some other way that doesn't update the work shift view automatically, a supervisor can manually confirm the shift for the employee.
By clicking the auctioned work shift on the anonymous row, the shift's information window opens up. There the supervisor can select the desired employee and change the work shift state to "Work shift confirmed".
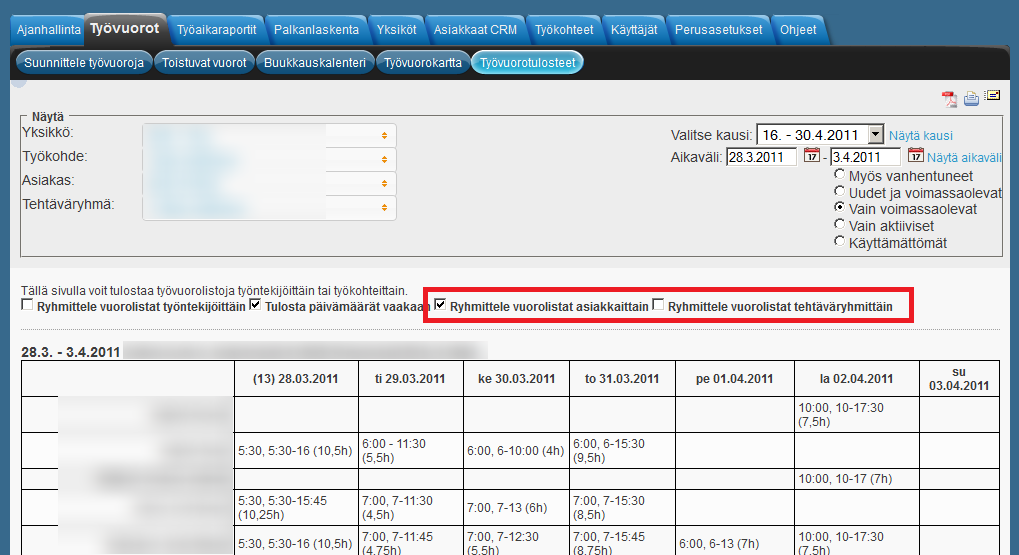
Work shift prints
It is possible to create work shift prints of confirmed shifts. This can be done in the Work shifts tab in the Work shift prints sub tab. There is a separate manual concerning work shift prints here Work shift prints and an instructional demo here http://www.tuntinetti.fi/demot/tyovuorotulosteet.htm?locale=en.
In the Work shift prints tab employees are able to create and examine work shift tables. Supervisors are also able to print and send them via email.
You must choose the filtering settings to create a work shift print. You are able to select units, projects, customers and tasks to be on the print. The shifts can be filtered for example by validity or if it has markings. In addition you are able to group the shift list's information and modify how the list will be visible with additional options. With these options you are able to make the work shift print organized and select how the information will be arranged in the list.
Employees have less choices in the grouping options:
Supervisors' view:
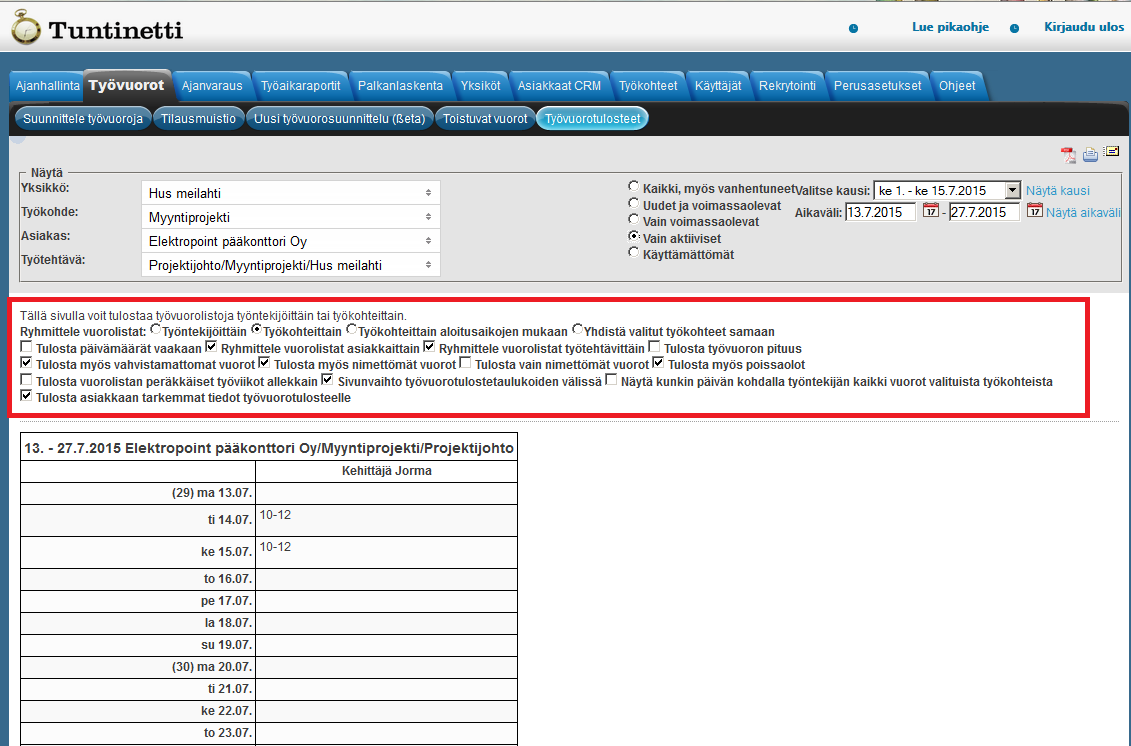
To view the print you must select a time range or a period. This can be done in the time range options. To show the time range's print, click "Show range".
Further information about work shift prints can be found in the work shift print manual and instructional demo that can be found in the Work shift print tab.