Time management > Booking calendar
The following explains how to use the Tuntinetti Booking calendar and how to use the booking functions. With the Booking calendar an employee can book shifts, view booked and open work shifts and mark absences or desired work shifts.
There is also an instructional video on how to use the Booking calendar at: Booking calendar - Tuntinetti
Activating the Booking calendar
If the Booking calendar is not showing on its own tab under Time management it must be activated in the Tuntinetti's paid features. The Booking calendar can be activated by going to the Basic settings, selecting the Tuntinetti's paid features tab and activating the Open shift auction via SMS/E-mail feature check-box.
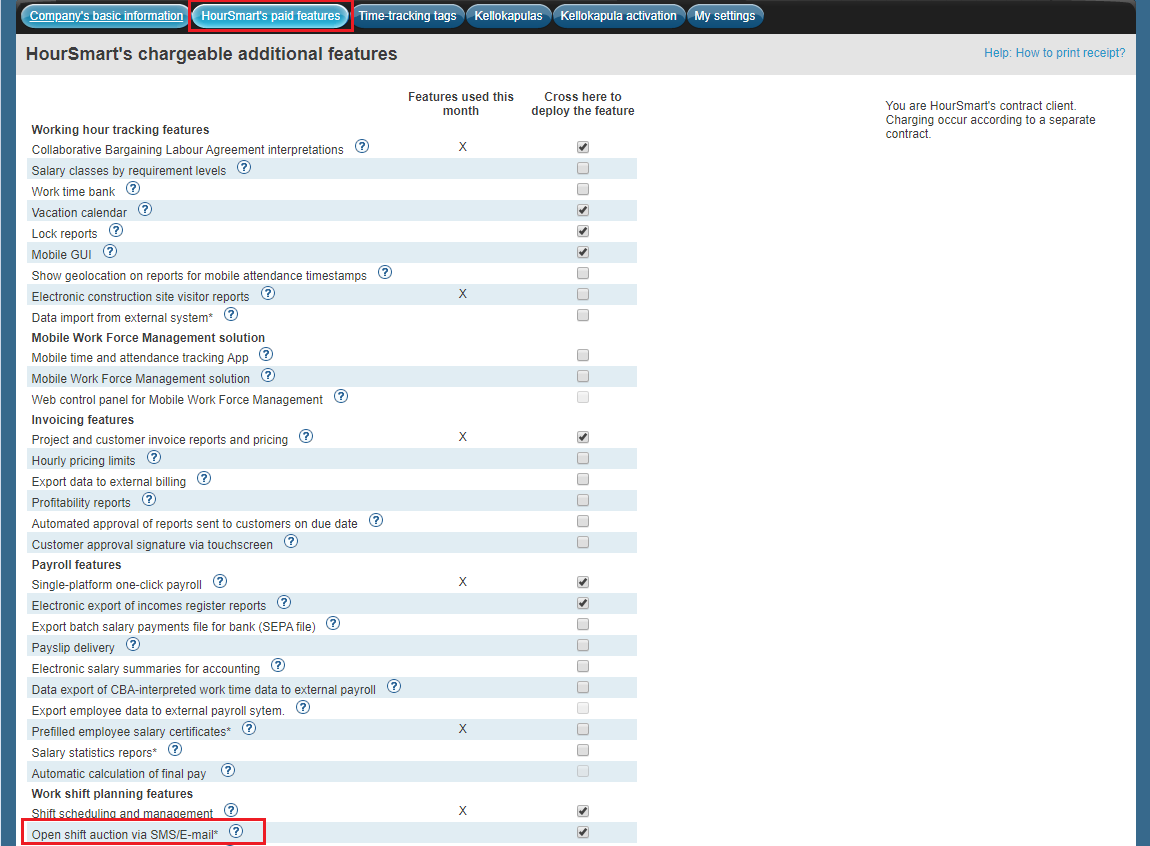
When the "Open shift auction via SMS/E-mail" is activated, the Booking calendar will be visible as its own tab under Time management.
Booking calendar will appear to employees if their unit has the "Work shifts open" setting defined or if the "All employees of the unit can confirm/select all planned shifts." setting is activated.
Booking shifts
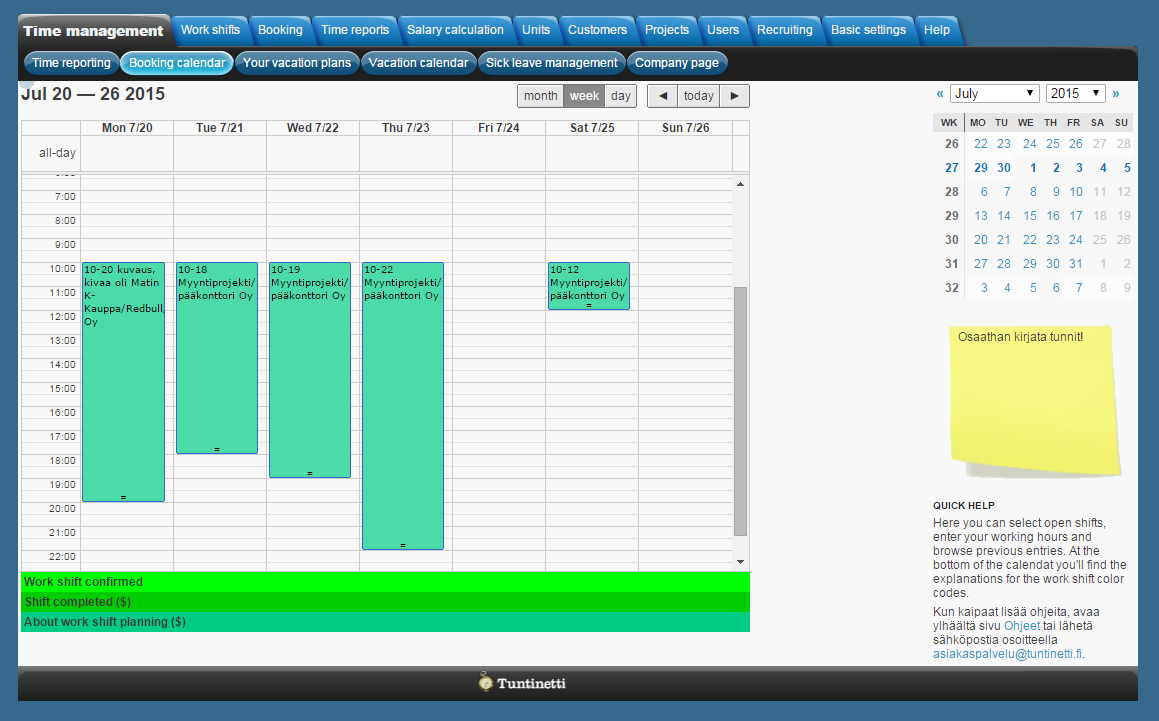
The calendar view
The view of the Booking calendar can be modified to show a month, a week or only a day. A date can be also selected in the calendar on the right and the Booking calendar is updated by that choice.
Booking a shift
An employee can book shifts that he or she wants from the shifts that the employer has created. The employee can also examine already accepted and open shifts in the calendar.

The color coding shows which state the shift is in. For example a green one is accepted and yellow is still an open shift. The colors are explained under the calendar.
When an employee wants to book an open shift for himself, all he has to do is click the shift. This opens a confirmation window where the employee accepts the work shift.
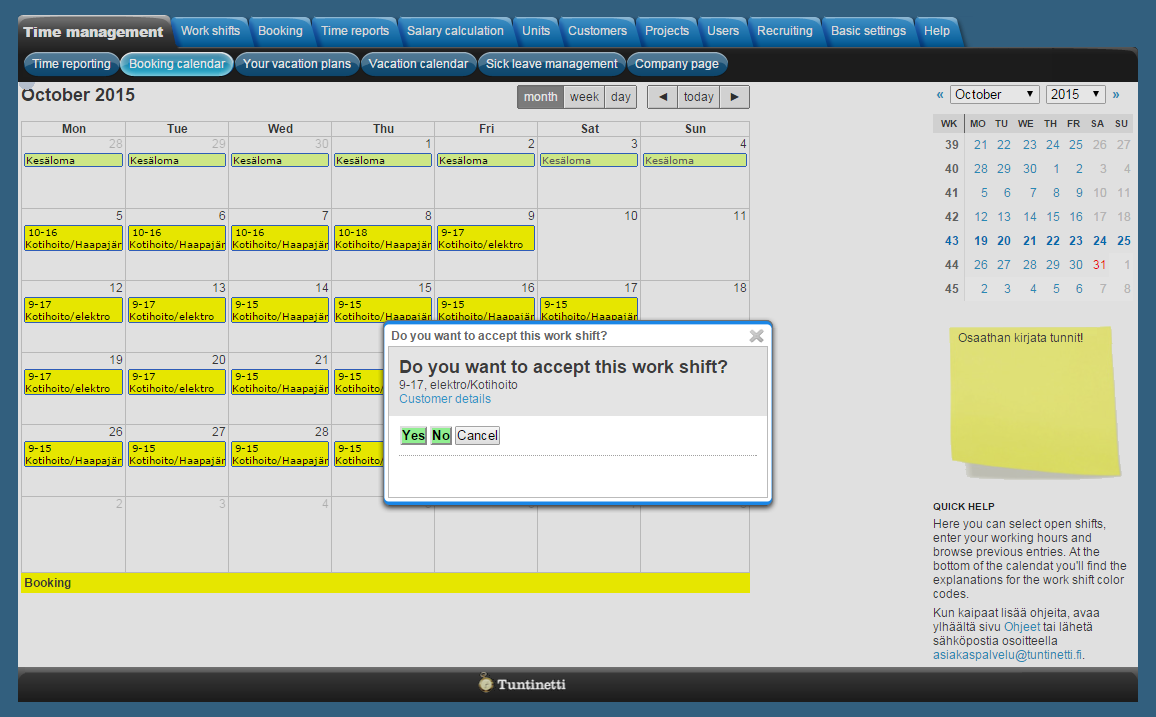
"Customer details" -link brings up the customer's information.
When the employee has booked an open shift, the color of the shift turns to green in the calendar. That means it is confirmed. The employee and the employer can see which work shifts are still open and which are taken. The employee can book more than one shifts at the same session.
The employee's own notes
The employees can also mark their own notes and desirable work shifts in the Booking calendar. Clicking an empty space in the calendar opens a new window where such notes can be added. For example you can mark a sick leave or unpaid absence to the chosen date.
Work shift prints
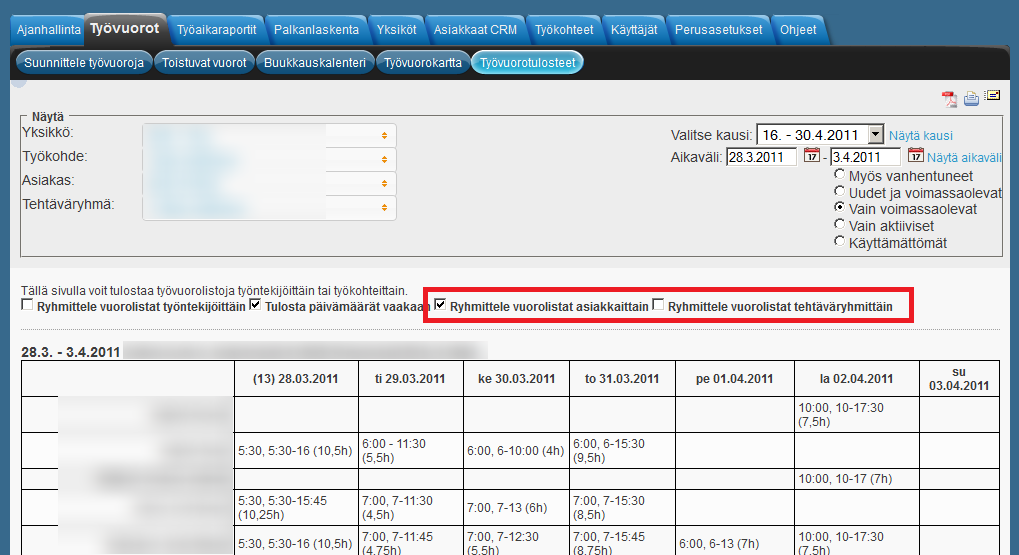
It is possible to create work shift prints of confirmed shifts. This can be done in the Work shifts tab in the Work shift prints sub tab. There is a separate manual concerning work shift prints here Work shift prints and an instructional demo here Work shift prints - Tuntinetti.
In the Work shift prints tab employees are able to create and examine work shift tables. Supervisors are also able to print and send them via email.
You must choose the filtering settings to create a work shift print. You are able to select units, projects, customers and tasks to be on the print. The shifts can be filtered for example by validity or if it has markings. In addition you are able to group the shift list's information and modify how the list will be visible with additional options. With these options you are able to make the work shift print organized and select how the information will be arranged in the list.
Employees have less choices in the grouping options:
Supervisors' view:
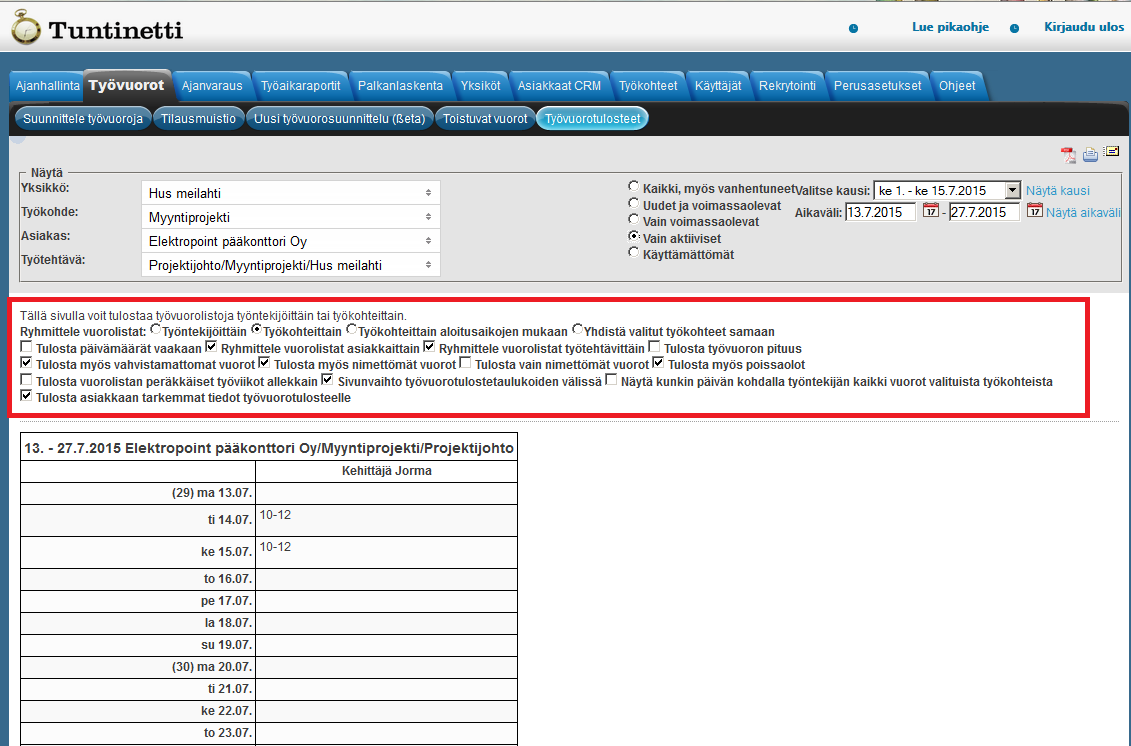
To view the print you must select a time range or a period. This can be done in the time range options. To show the time range's print, click "Show range".
Further information about work shift prints can be found in the work shift print manual and instructional demo that can be found in the Work shift print tab.