Recruiting > Job ads
The following explains how to search, edit and create job ads. In Tuntinetti, you can create job ads to your company's website as well as to services like Mol, Monster and Oikotie.
There is an instruction video about the topic here: Publishing job ads - Tuntinetti
Search functions
Job ads can be searched by using application time or jobs starting day as well as keyword search. You can also filter job ads with Skills menu, which allows you to choose skills that are required for the jobs. From Show to user menu you can choose, whether you want search results to show unpublished (No), published (Yes) or all (Any) job ads. Use the Filter button to conduct searches.

Creating new job ad
Press "+ Add" button to start creating new job ad.
Filling the job ad form
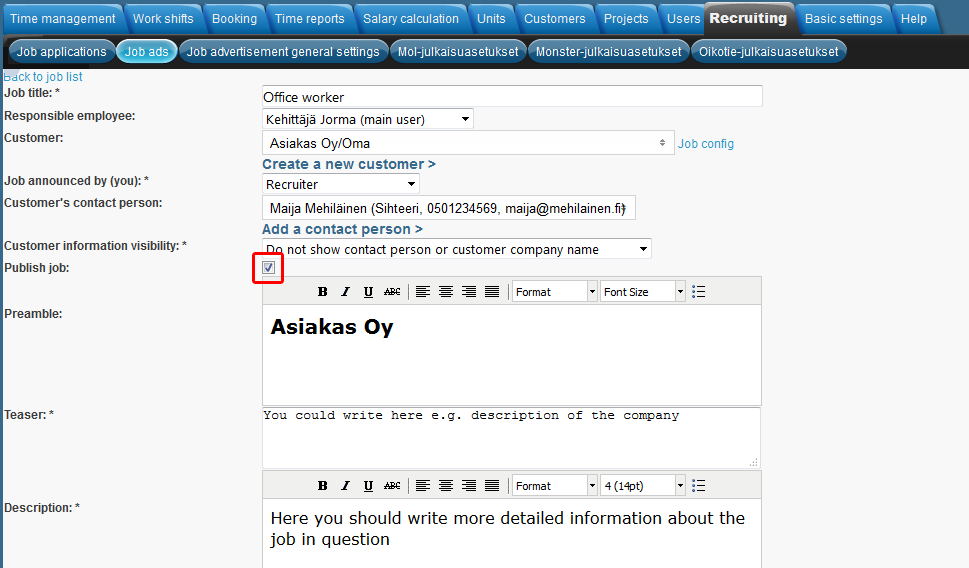
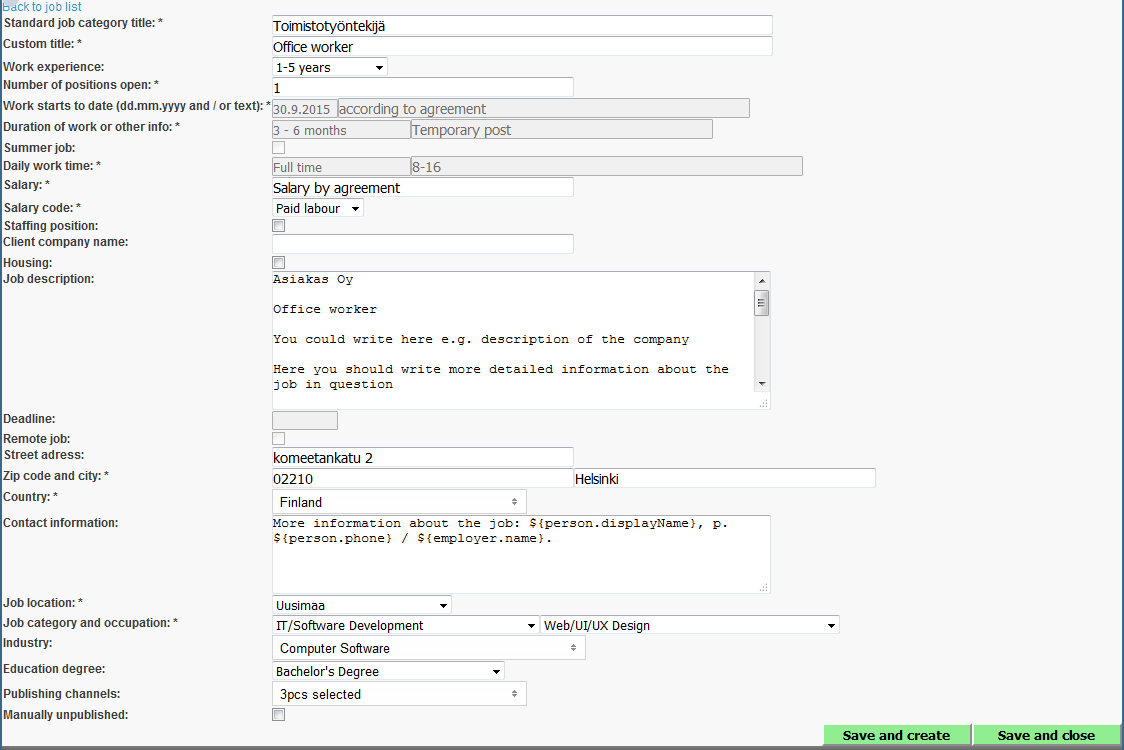
- Job title*
- Fill in the job title e.g. Office wroker
- Responsible employee
- Choose the person responsible for this job ad
- Customer
- If needed, choose existing customer from menu or create new by pressing "Create a new customer >"
- Job announced by (you)*
- Self
- Recruiter
- Subcontractor employer
- Staffing employer
- Customer's contact person
If customer has been chosen, you can choose customer's contact person from this menu or add new by pressing "Add a contact person >"
- Customer information visibility*
- If customer has been chosen, you can choose what information will be visible in the job ad
- Do not show contact person or customer company name
- Do not show contact person but show customer company name
- Show contact person and customer company name
- If customer has been chosen, you can choose what information will be visible in the job ad
- Publish job
- If this is selected, job ad will be published when it is saved
- You can unpublish the job ad by unselecting this
- If this is selected, job ad will be published when it is saved
- Preamble
- Prefilled according to the settings in the "Job advertisement general settings" tab
- Teaser*
- You could write here e.g. description of the company
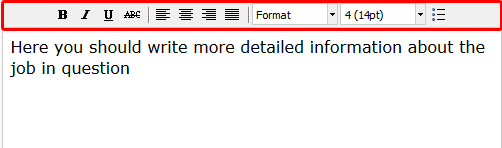
- Description*
- Here you should write more detailed information about the job in question
- Needed skills
- See details below in the Job ads#Adding skill requirements section
- Needed language skills
- See details below in the Job ads#Adding needed language skills section
- More information about required skills
- Here you can write more detailed information about the required skills and education
- Daily work time*
- Daily work time can be selected from the menu and in the text field you can write additional information e.g. 8-16
- Work starts date (dd.mm.yyyy and / or text)*
- Work's starting date can be set as accurate date and/or as a text
- Job duration*
- Jobs duration can be selected from the menu and in the text field you can write additional information e.g. Temporary post
- Start date*
- When does the application time start
- End date
- When does the application time end
- Job can be state as summer job with this checkbox
- Number of positions open*
- Payment options*
- Additional information about compensation*
- You can give additional information about compensation e.g. Salary by agreement
- Housing available
- You can also announce the possibility of housing
- Job opening challenge
- Prefilled according to the settings in the "Job advertisement general settings" tab
- Application processing schedule
- Prefilled according to the settings in the "Job advertisement general settings" tab
- More information
- Here you can edit how and who gives more information about the job
- Keywords
- Write down keywords related to the job in question, e.g. Office work, Word, Excel, ...
- Unit name to show to job applicants
- When needed, unit can be selected from the menu to be shown to the job applicants
- You can select any existing unit from the system
- Employee can filter open ads according to the units in the listing for open jobs
- Remote job
- If the job is at many locations or remote work, job's location address won't be shown and there will be mention of remote job in the job ad
- Job location street address
- Prefilled according to the settings in the "Job advertisement general settings" tab
- Postal code
- Prefilled according to the settings in the "Job advertisement general settings" tab
- City*
- Prefilled according to the settings in the "Job advertisement general settings" tab
- Country*
- Prefilled according to the settings in the "Job advertisement general settings" tab
- Footer
- Prefilled according to the settings in the "Job advertisement general settings" tab
Text formatting
Text formatting menus are located in the top part of the text areas.
Prefilled sections
Prefilled sections (Preamble, Job opening challenge, Application processing schedule, Job location street address, Postal code, City, Country and Footer) can be edited directly in the ad or in the "Job advertisement general settiings" tab. Recruiting > Job advertisement general settings
Adding skill requirements
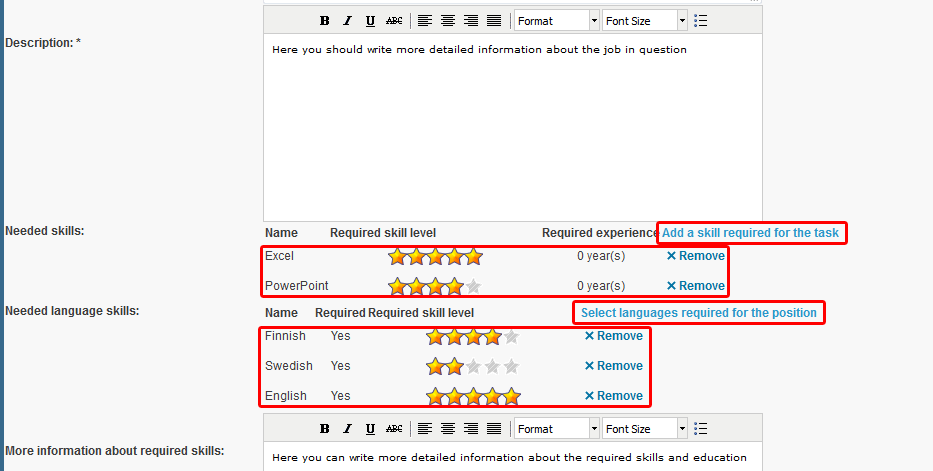
Skills needed in the job, can be added from "Add a skill required for the task" link.
Choosing skill requirements:
- Open the window for skills and qualifications, by clicking "Add a skill required for the task"
- If skills or qualifications have been created, they are displayed here
- Choose skills from the list, by selecting the checkboxes
- Additional options appear next to the skills
- Set wanted experience from "Duration" link and press "Ok" button
- Press "Save changes and close" button
- Selected skills are now displayed in the "Needed skills" section
- If you want, you can set "Required skill level", by selecting 1-5 stars with mouse
Creating new skill/qualification group (In the skills and qualifications window):
- Select "+Add new group" button
- Give the new skill group a name
- Press "Save changes and close" button
- New group is now displayed on the list
Creating new skill (In the skills and qualifications window):
- Select "+Add new skill" link next to desired skill group
- Give the new skill a name
- Press "Save changes and close" button
- New skill is now displayed on the list under the skill group
Adding needed language skills
Langauges needed in the job, can be added from "Select languages required for the position".
- Select "Select languages required for the position" link
- New window opens
- Select desired languages from the menu
- Press "Save changes and close" button
- Selected languages are now displayed in the "Needed language skills" section
- If you want, you can set "Required skill level", by selecting 1-5 stars with mouse
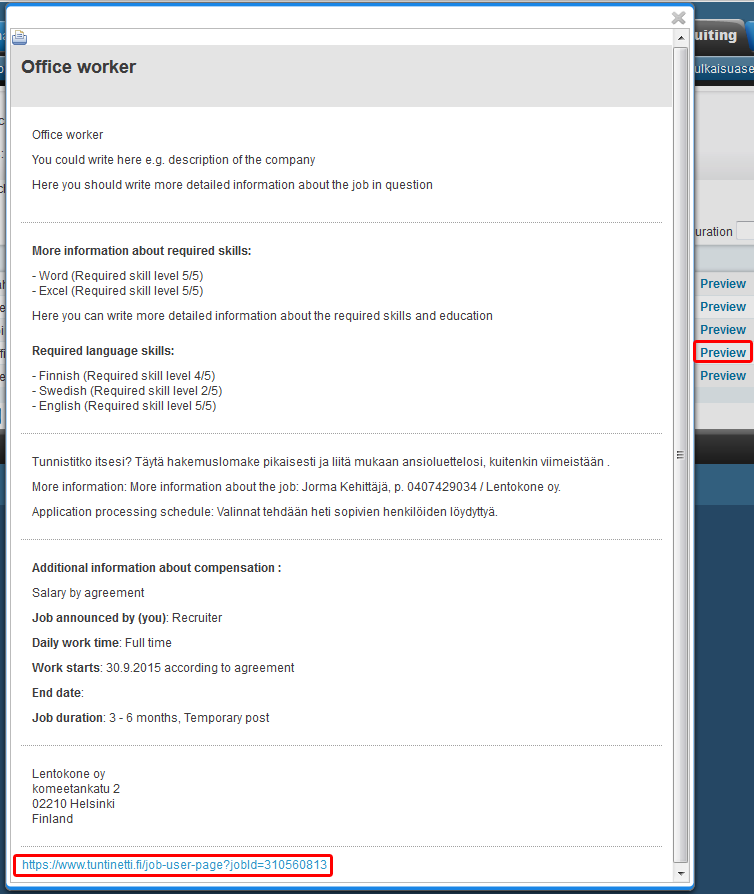
Preview
Job ad can be previewed from "Save and preview" buttom.
Publishing the ad
If you want to publish the ad right away, remember to select the "Publish job" checkbox before saving the ad. You can unpublish the job ad, by unselecting the "Puhblish job" checkbox.
Publishing:
- Fill in at least the mandatory fields marked with asterisks*
- Select "Publish job" checkbox
- If you want to publish Mol/Monster/Oikotie ads at the same time, select "Create Mol/Monster" checkbox
- Save the ad
- If you selected "Create Mol/Monster" checkbox, fill in the necessary additional information needed for those ads
- Check Job ads#Creating Mol/Monster/Oikotie ads section for more detailed instruction
Stopping the publishing of the job ad
If you want to stop the publishing of the job ad, first open the job ad for editing with the "Modify" button. Unselect the "Publish job" checkbox and save the ad, at which time the publishing will end.
Creating Mol/Monster/Oikotie ads
User needs to have username and password to Mol/Monster/Oikotie web site and compnay needs to have ”Työpaikkailmoitusten julkaisu Mol:iin/Monsteriin/Oikotielle” additional features enabled, in order to publish job ads to Mol/Monster/Oikotie web sites. Also the publishing settings for Mol/Monster/Oikotie needs to be set. Those publishing settings can be edited in their own tabs and instruction on how to do it can be found from the following links: Recruiting > Mol-publishing settings, Monster-publishing settings or Oikotie-publishing settings.
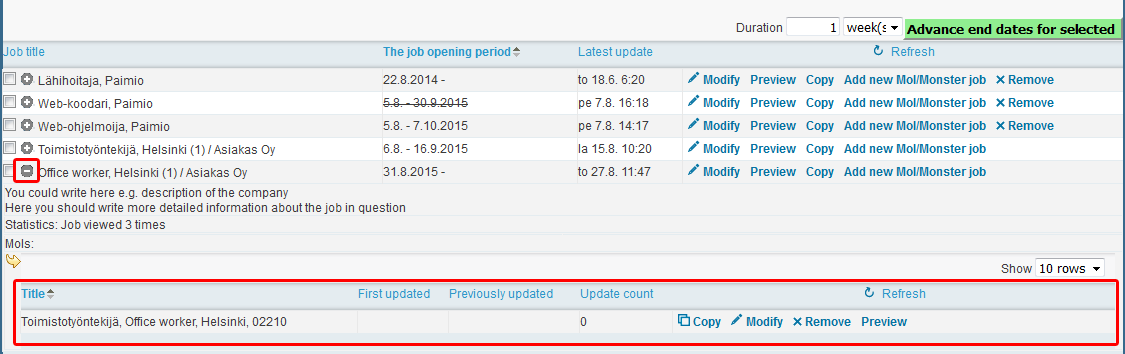
Mol/Monster/Oikotie ads can be added, either by selecting the "Create Mol/Monster" checkbox before saving the job ad or later from "Add new Mol/Monster job" link. Previously created Mol/Monster/Oikotie ads can be modified, by first expanding the job ad from  sign and then clicking "Modify" link next to the Mol/Monster/OIkotie ad.
Mol/Monster/Oikotie ad and publishing it:
- Select "Create Mol/Monster" checkbox during the creation of the job ad or "Add new Mol/Monster job" link from the list of job ads
- Fill in at least the required fields marked with an asterisk *
- Most of the text fields has already been prefilled according to the job ad created before
- Some of the information can be changed
- Mol requires job title according to their own standard, which is filled in the "Standard job category title" text field
- Program offers selection list when you start writing in the text field (After 3 letters)
- If needed, list of the Mol job category titles can be found by searching from the internet
Select the "Publishing channels"
- Mol, Monster and/or Oikotie
- Publishing can be blocked, by selecting "Manually unpublished" checkbox
- Filled information can be saved and edited later
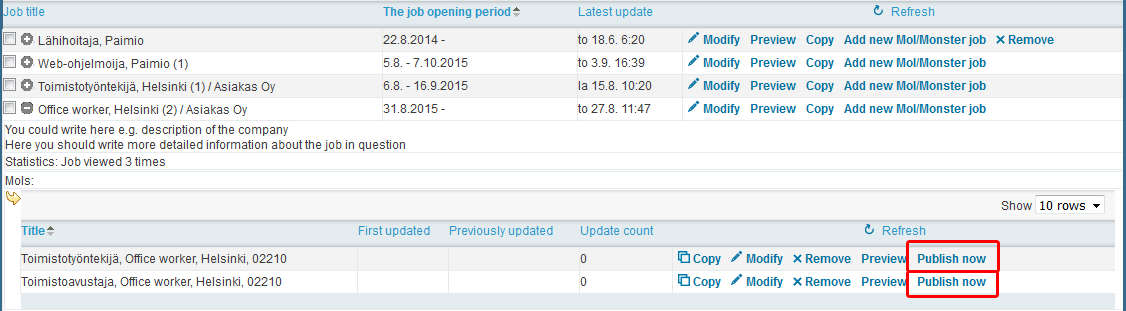
- Save the job ad
- Job ad needs to be published by pressing "Publish now" button, that can be found next to the Mol/Monster/Oikotie ads
- Expand job ad in the list with button and press the "Publish now" button next to the Mol/Monster/Oikotie ad
- Expand job ad in the list with
Viewing and editing ads
Ads found with search functions are displayed in a list, from where they can be:
- Modified
- Previewed
- Copied
- Add new Mol/Monster job ad
- Removed
Number of Mol/Monster/Oikotie ads associated with the job ad is displayed inside brackets next to the job ads name. Ad can be expanded for more information with "+" sign, before job ads name. There you can see how many times job has been viewed and what is the state of the Mol/Monster/Oikotie ads. These ads can be copied, modified, removed and previewed from here.
Preview
In the preview windows, you can find a link to the actual job ad.
Advancing end dates
Selected job ads end dates can be conveniently extended with "Advance end dates for selected" button:
- Select ads from the list
- Write wanted duration in "Duration" text field
- Choose unit for the duration
- Press "Advance end dates for selected" button
- Selected ads' end dates have now been advanced