Helper can be used with every mobile platform, Android, iOS, and Windows Phone operating systems.
Activating Helper Mobile
By activating Helper in Tuntinetti's addtional features you can combine Helper Mobile Work Force solution with Tuntinetti. This way every work time markings in Helper will automatically be updated to Tuntinetti.
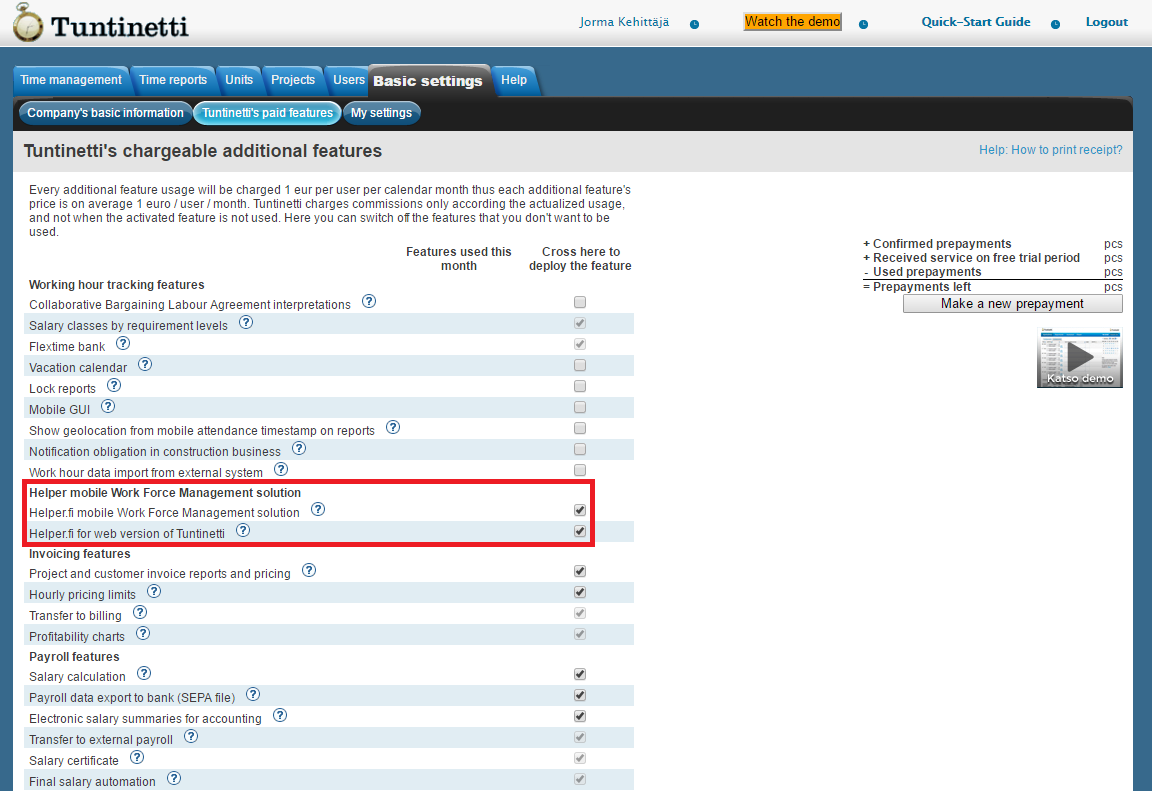
For Helper to work well with Tuntinetti, some settings need to be defined in Tuntinetti. You can read about these settings in the Helper settings in Tuntinetti guide.
Using Helper as a supervisor
Searching customers
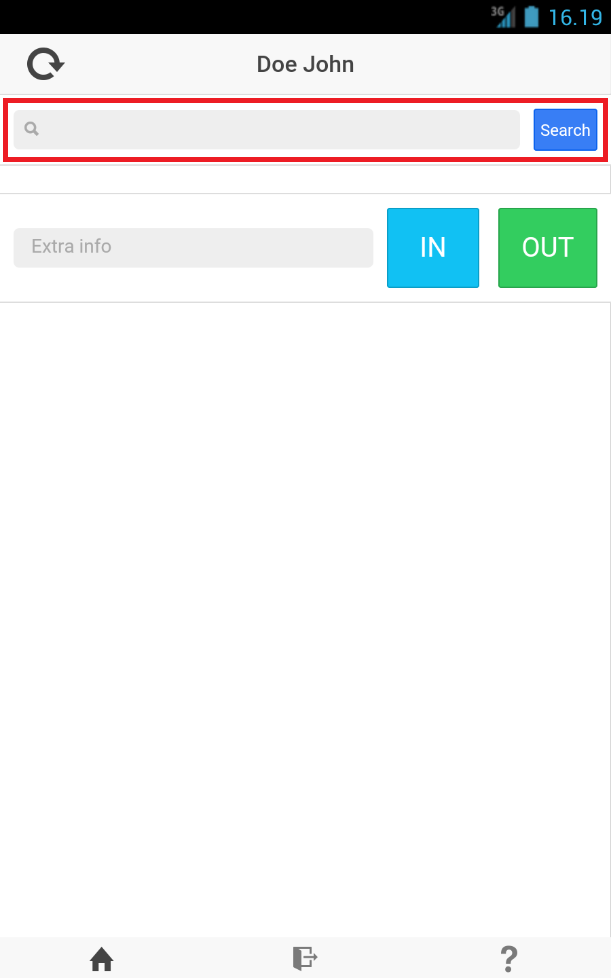
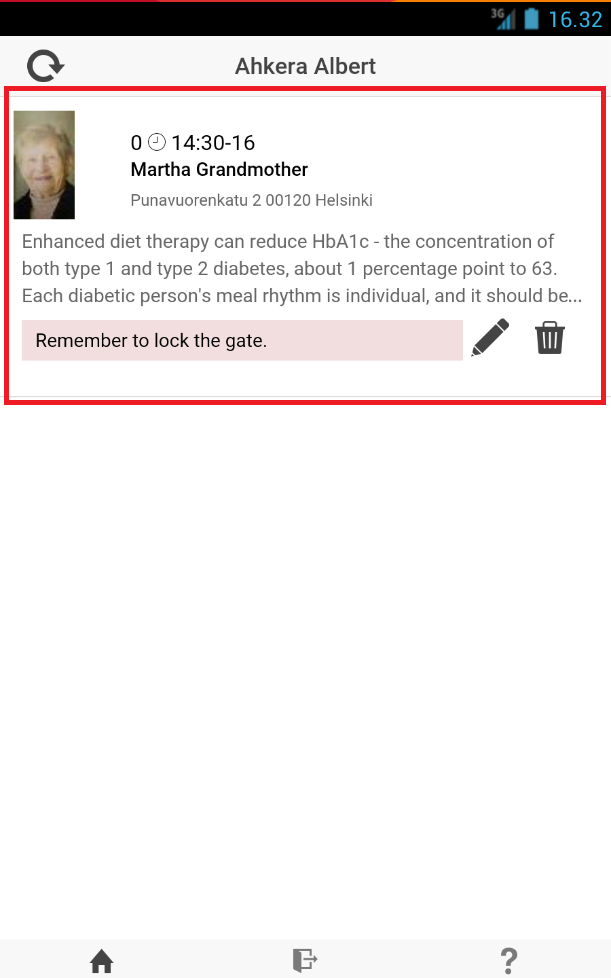
You can search customers with the search field. Just write the customer's name and click Search. Three first letters are enough for it to search for customers.
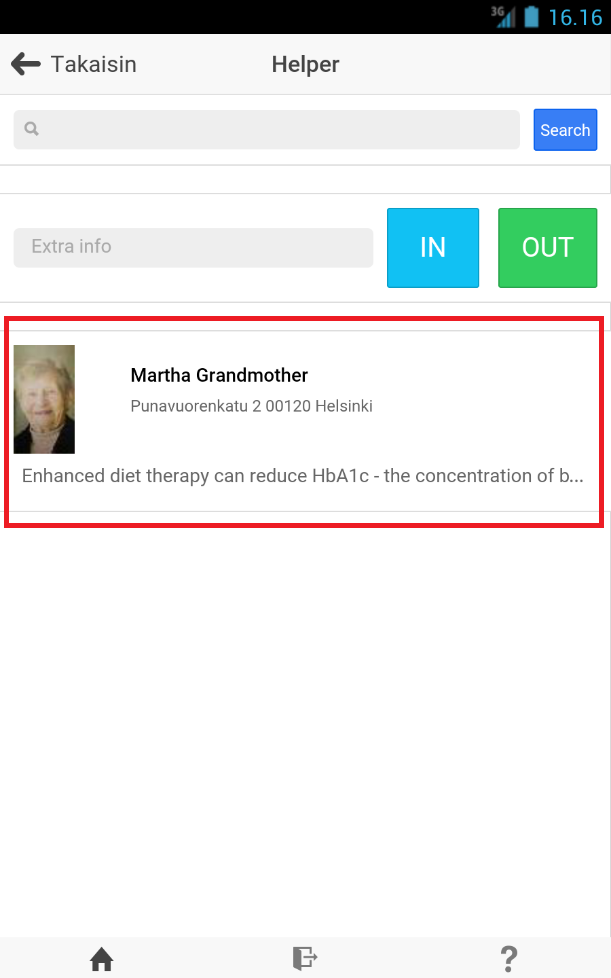
The customers which match the search will be updated to the page. By clicking a customer, his or her detailed information will be opened.
Customer information
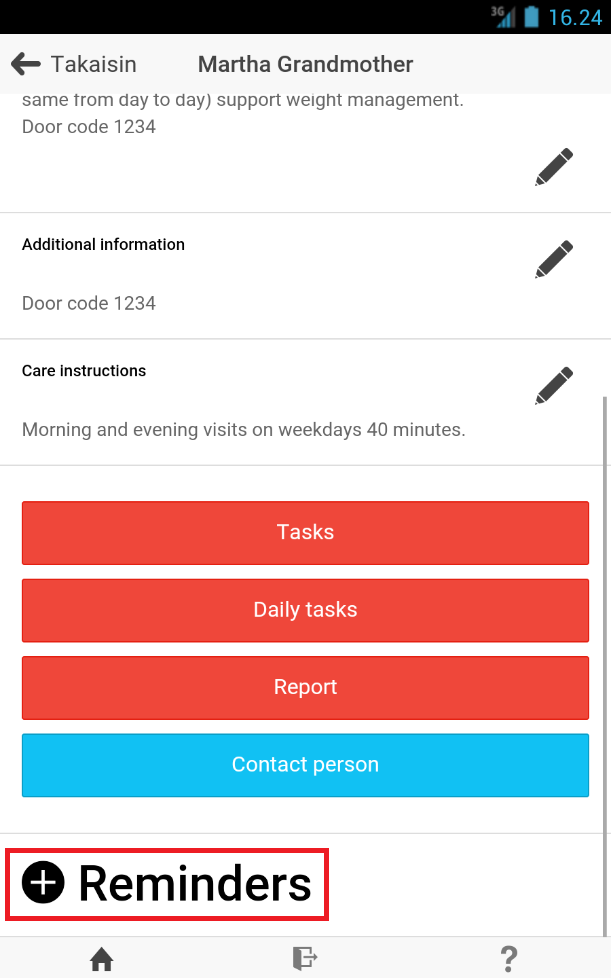
Customer information has the customer's name, address, phone number and notes from Tuntinetti. By clicking the picture the mobile device's camera opens up. You can take a picture of the customer and save it.
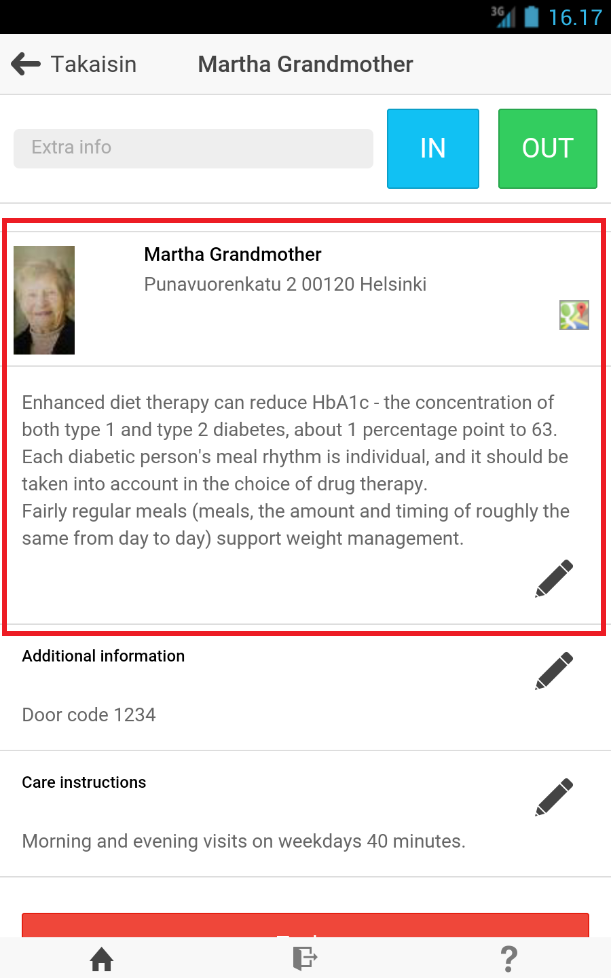
A supervisor can modify the text fields by clicking the Pen icons.
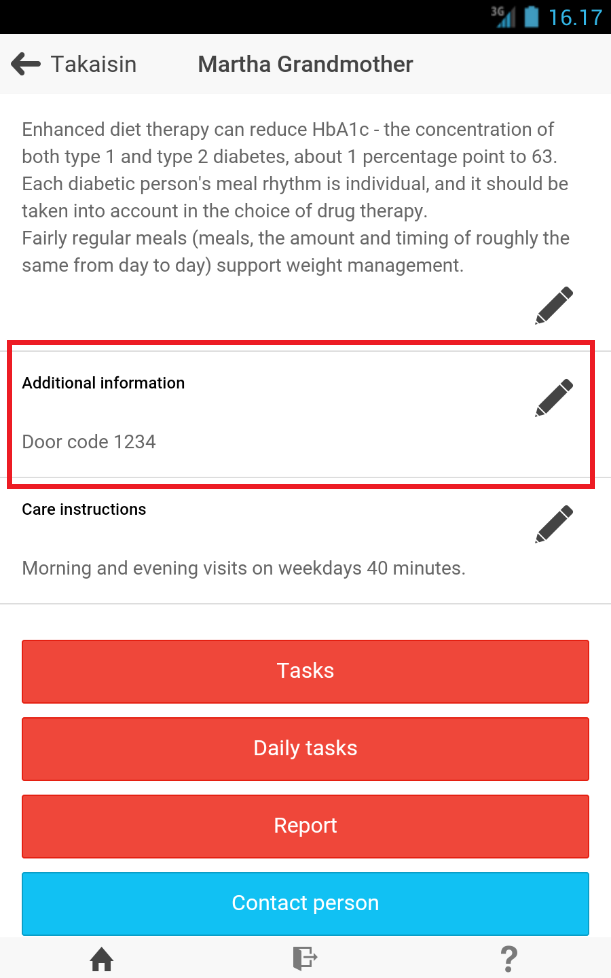
You can enter important information, like a door code, to the Additional information field.
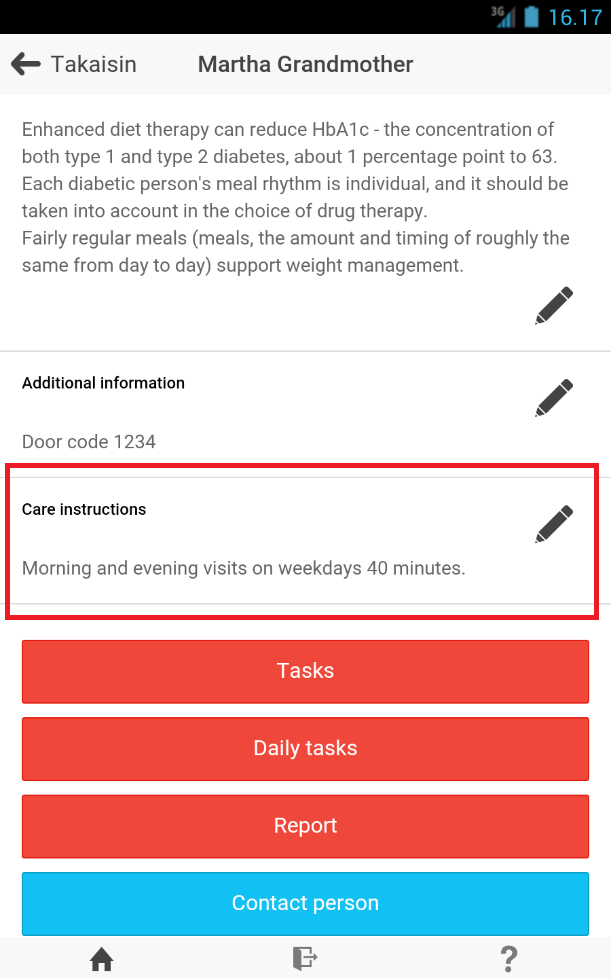
You can enter further instructions in the Care instructions field.
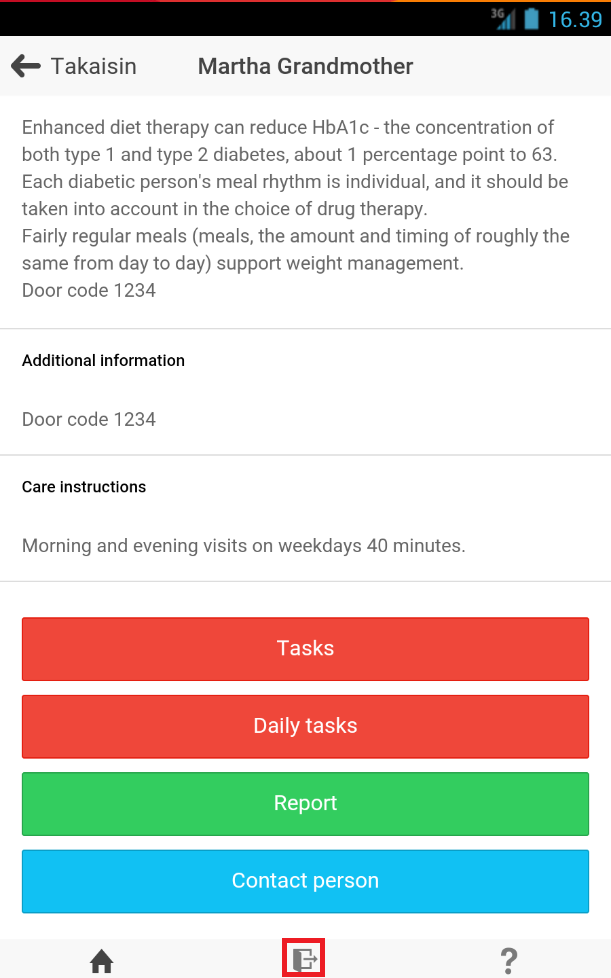
On the bottom of the page there are four function buttons:
- Tasks
- Daily tasks
- Report
- Contact person
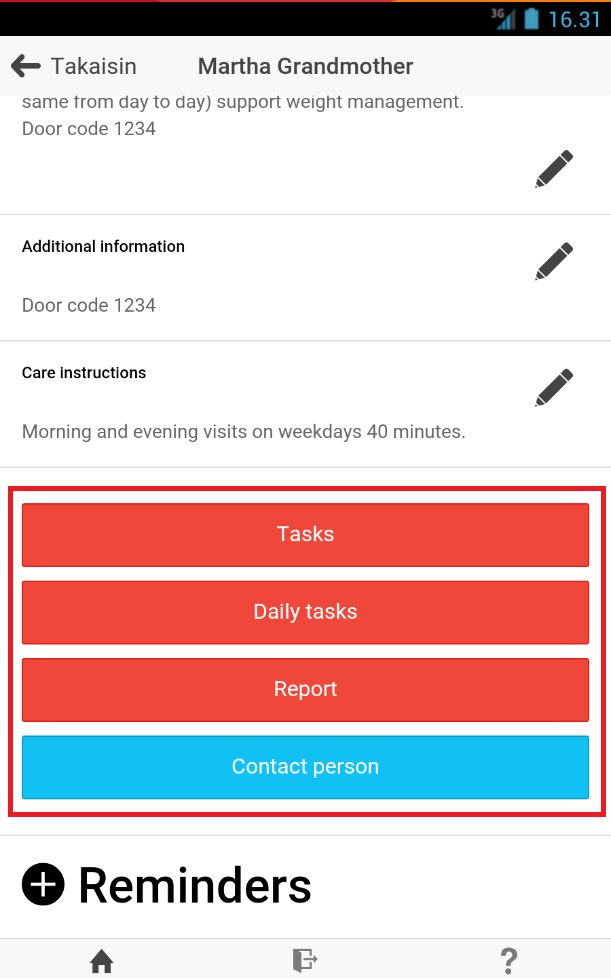
The color of the function buttons are red to the employee, besides the Contact person button, until the task is marked as done. This way the employee can easily see which tasks are done.
Daily tasks may also include the instructions of medication and a medication list.
Adding and modifying tasks
Tasks can be added and modified by opening the Tasks function.
A new task can be added with the + button.
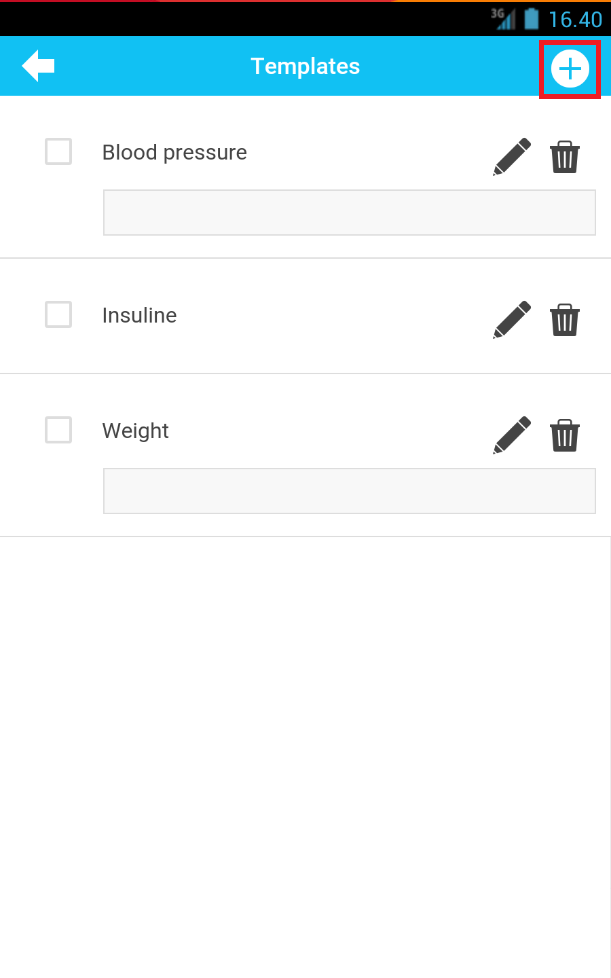
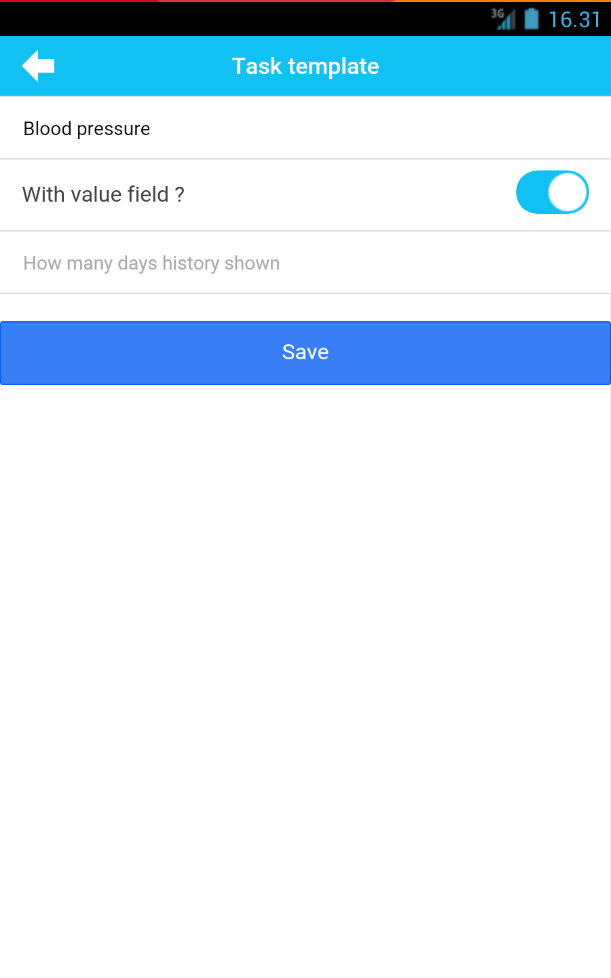
The new task must have a name. You can also define if the task has a value and how many days' value history is shown. If the task doesn't need a value, it is marked as done with a check-box and history information is not saved.
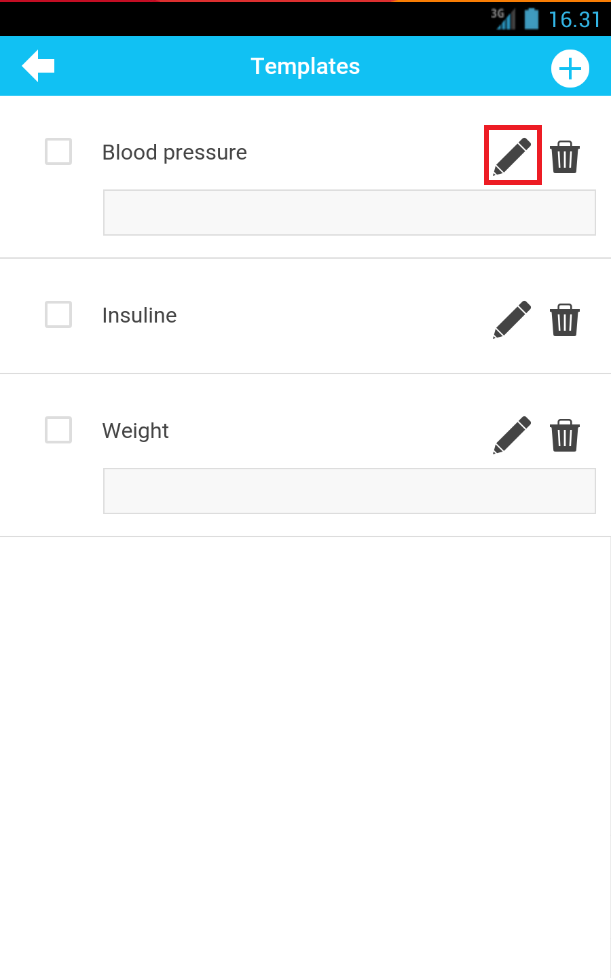
Old tasks can be modified with the Pen button. This opens up the task's information.
Arranging tasks
Tasks can be arranged to a specific arrangement with the arrow-buttons.
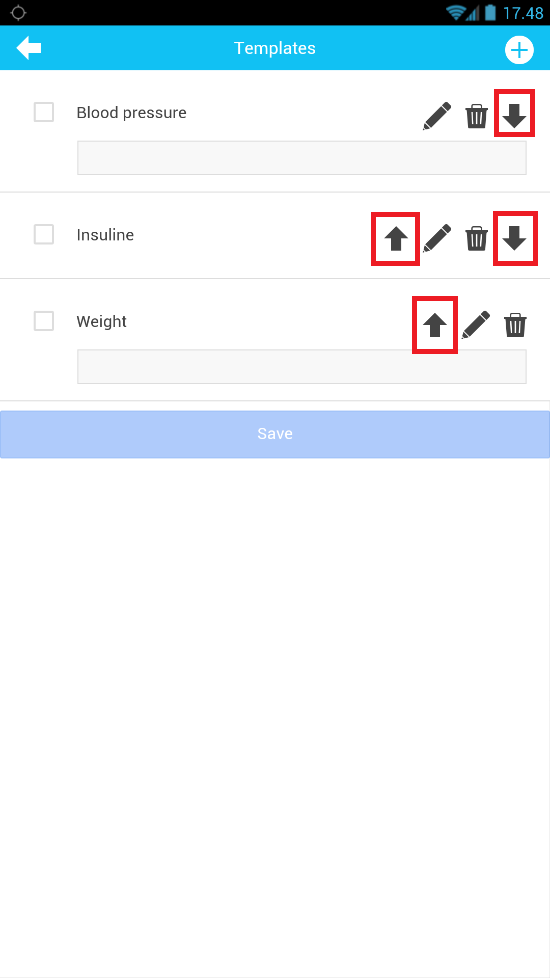
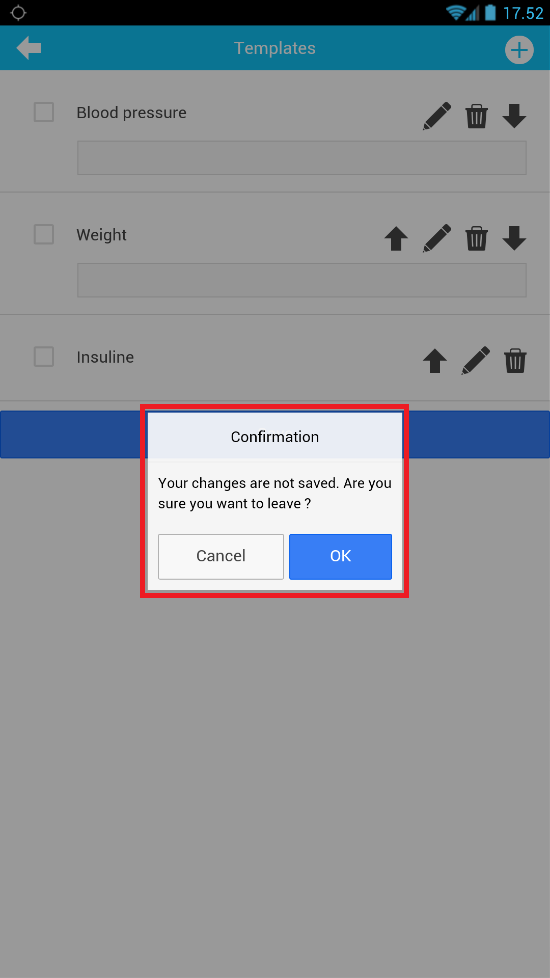
Changes must be saved with the Save-button
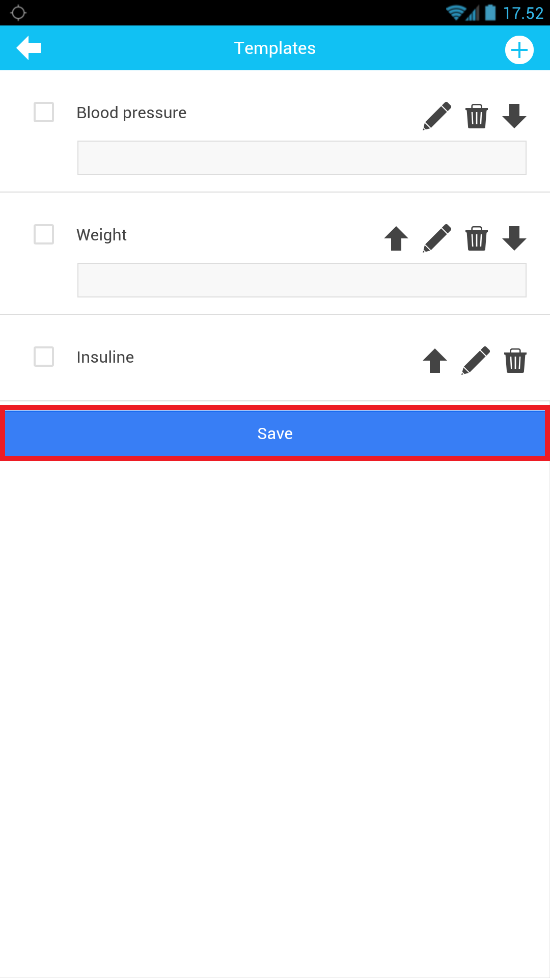
If you don't want to save the changes that have been made, you must confirm it by clicking OK in the popup.
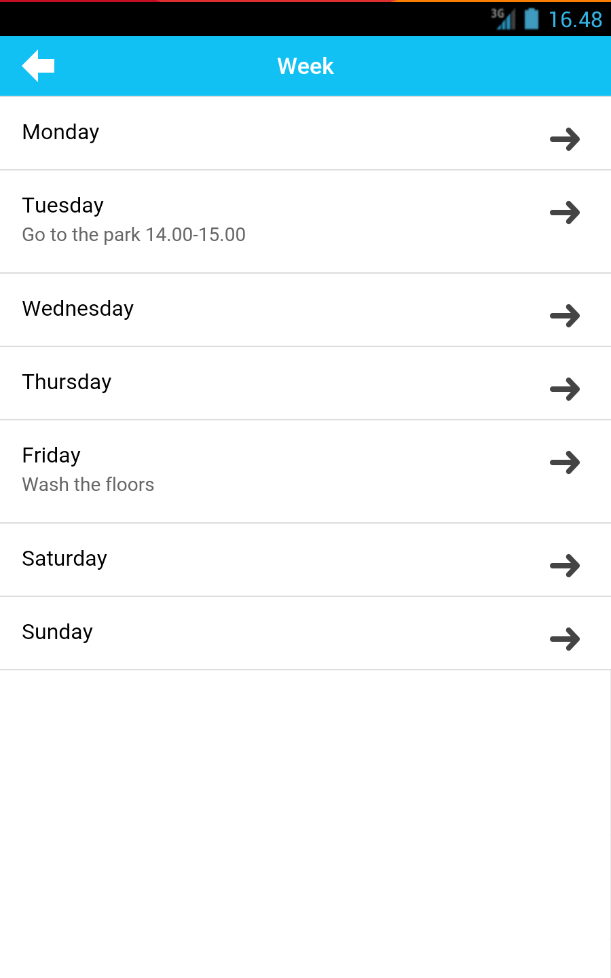
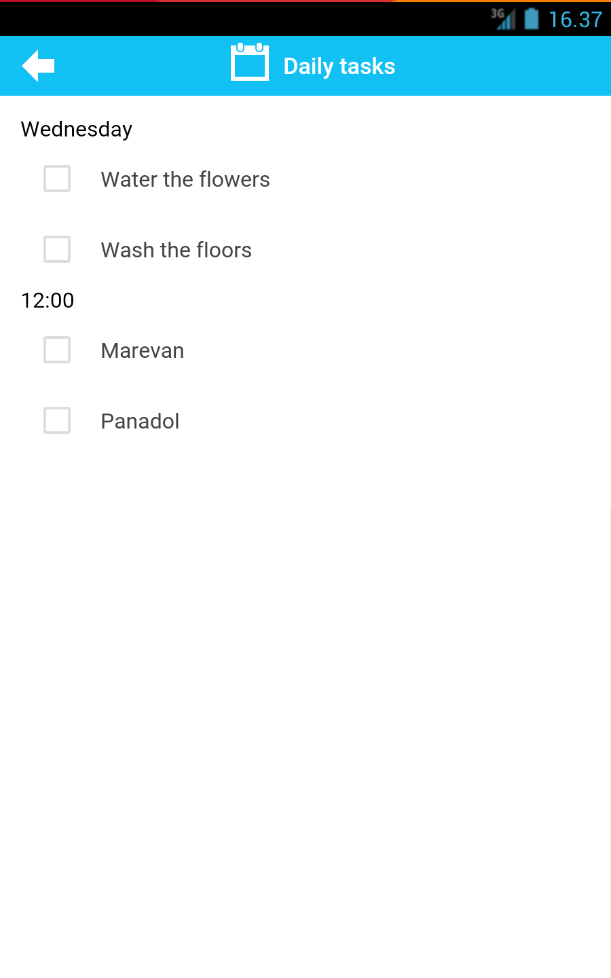
Daily tasks
You can open a week calendar with the Daily tasks function button. A single day's tasks can be opened up with the arrow button next to the desired weekday.
You can add different kind of daily tasks with the + button:
A Day specific medication
A Day specific medication needs to have a description, notes such as dosage instruction and the purpose of the medication. The medication can be also added a day and a time when it should be taken.
A When needed medication
A When needed medication is the same as the day specific medication, but without a time.
A Daily task
A Daily task needs to have a description, notes, purpose and the days it should be done.

Reporting
You can browse and send employees' reports in the Reports page with the Browse or Send reports button.
To browse reports you must select a time range of which the reports are fetched.
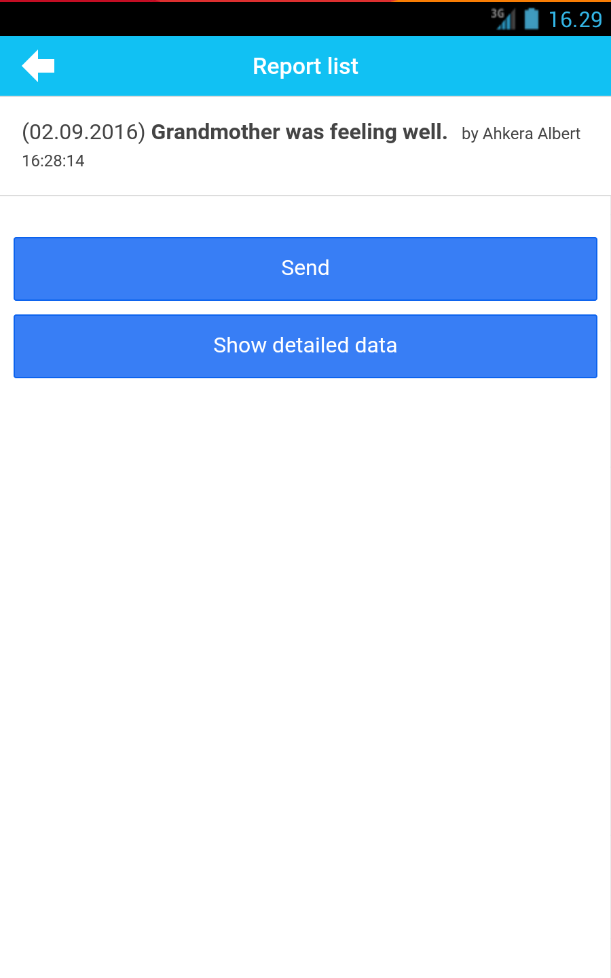
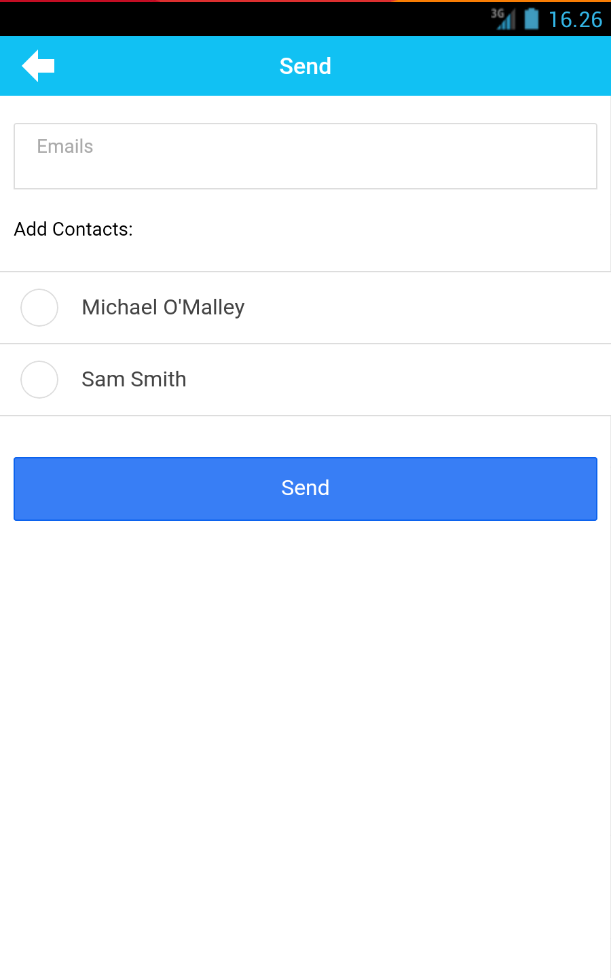
The report can be sent with the Send button. A page opens up where you need to select the contact persons (Contact persons can be added according to the Contact person instruction.) or add an email address where the report is sent.
Contact persons
You can add or modify contact persons in the Contact person view. All of the current contact persons are on this page also.
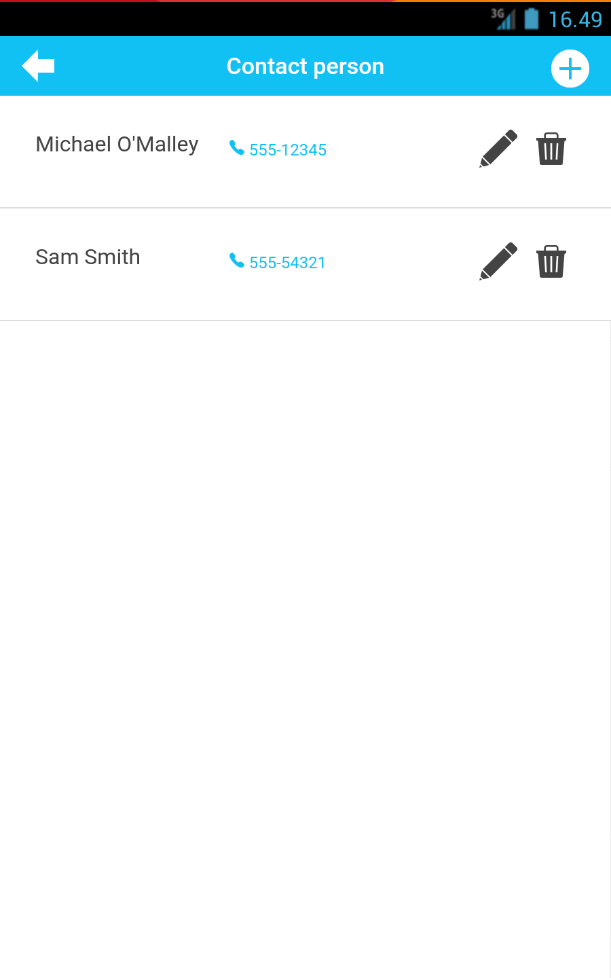
A new contact person can be added with the + button. A contact person can have the following information:
- Title (You can enter here a relationship such as son or a title such as doctor.)
- First name
- Last name
- Phone
- Description (Here you can add notes or other additional information.)
Helper saves the contact person's information that can be changed with the Pen button or removed with the Trashcan button.
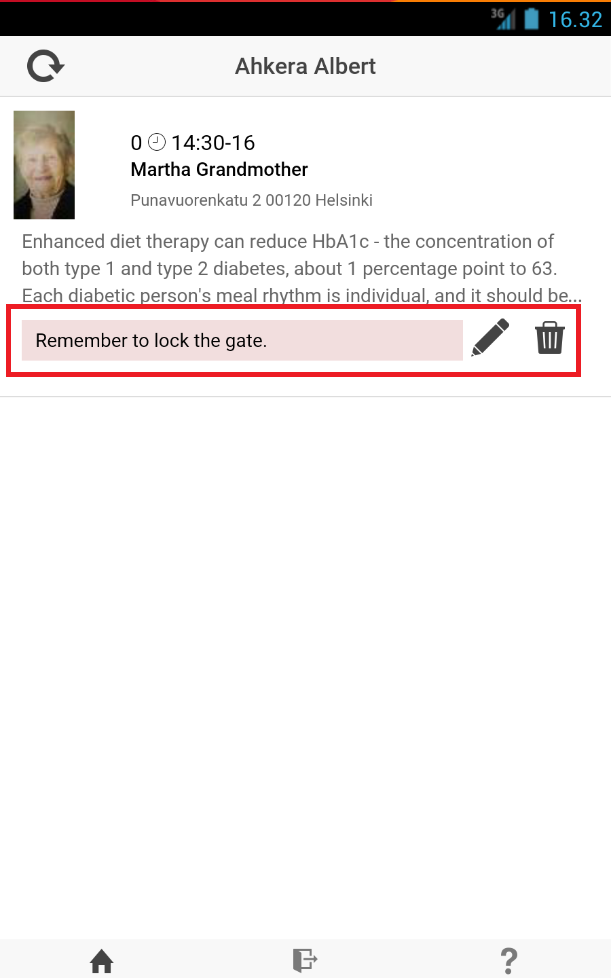
Reminders
With reminders you add a note to the cutomer's information. This can be a note for example for the next employee. The reminder is visible next to the customer in the customer list.
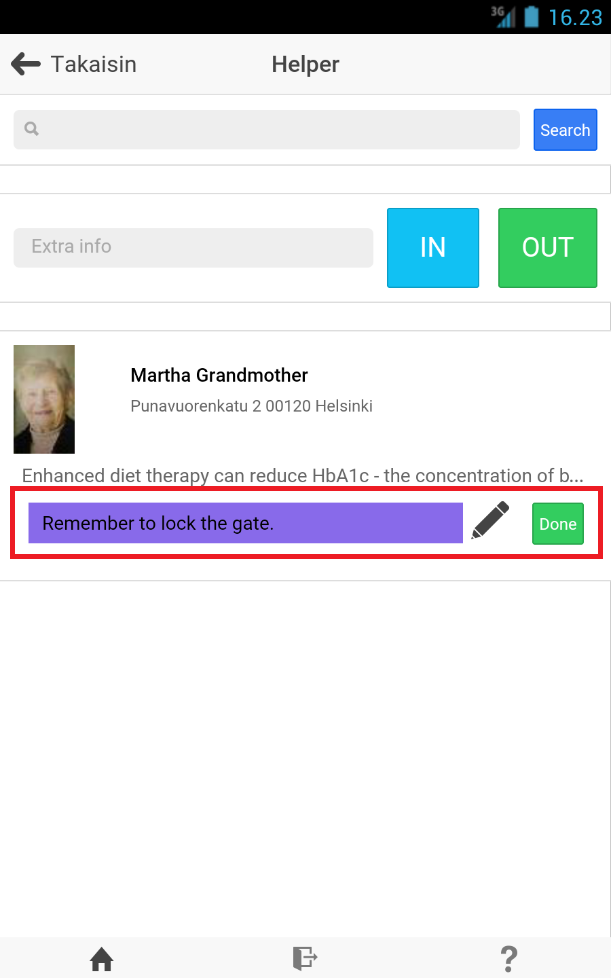
A new reminder can be added with the + button. This opens up a window where you can write down the reminder, After this save the reminder with the Save button and it will be added to the customer. It can be marked as done with the Done button.
Using Helper as an employee
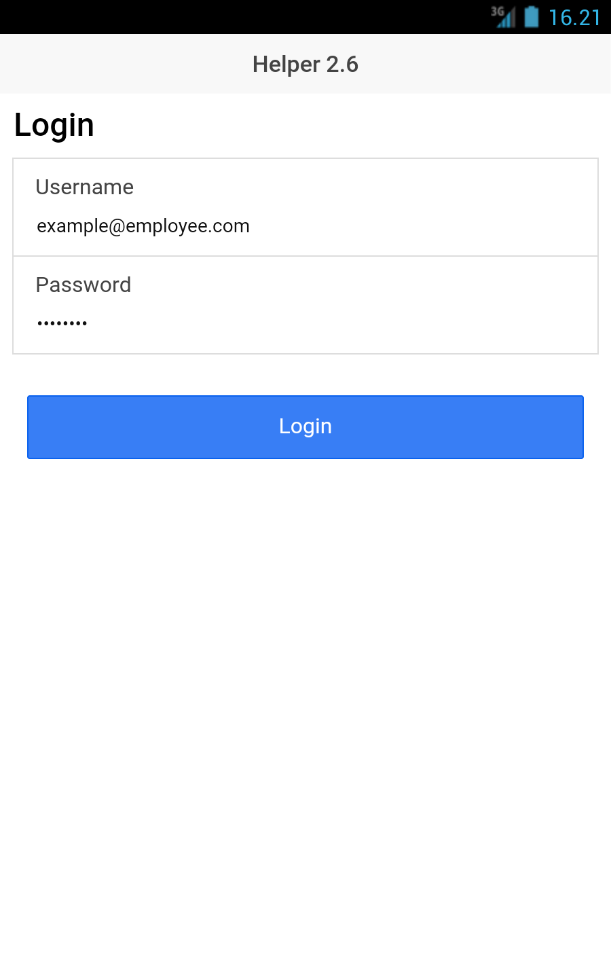
Logging in
An employee can login to Helper with the Tuntinetti account information. Password should be changed to a password that is easy and fast to enter because the application locks down after it is not used for 5 minutes. The password must be entered again each time it locks down. Although password shouldn't be an unsafe one like your own name.
When the employee has logged in, the day's customer list opens up.
Stamping
An employee can stamp him- or herself to work in the customer view by pressing the customer in the customer list. In the customer view the employee can stamp in with the IN button or out with the OUT button. When the employee presses the IN button, the mobile device's camera turns on. The employee should stamp in using the QR code that is placed to the customer's house. The QR code can be scanned with the device's camera by pointing the camera to the QR code until the device makes a sound. When the QR code has been scanned successfully, Helper goes back to the customer information. If there are problems with the QR code or there isn't one, go back with the Back button. This way the work time will be saved with the GPS location information. Stamping out is done the same way, but using the OUT button.
When an employee arrives to a customer, he or she should first stamp him- or herself in.
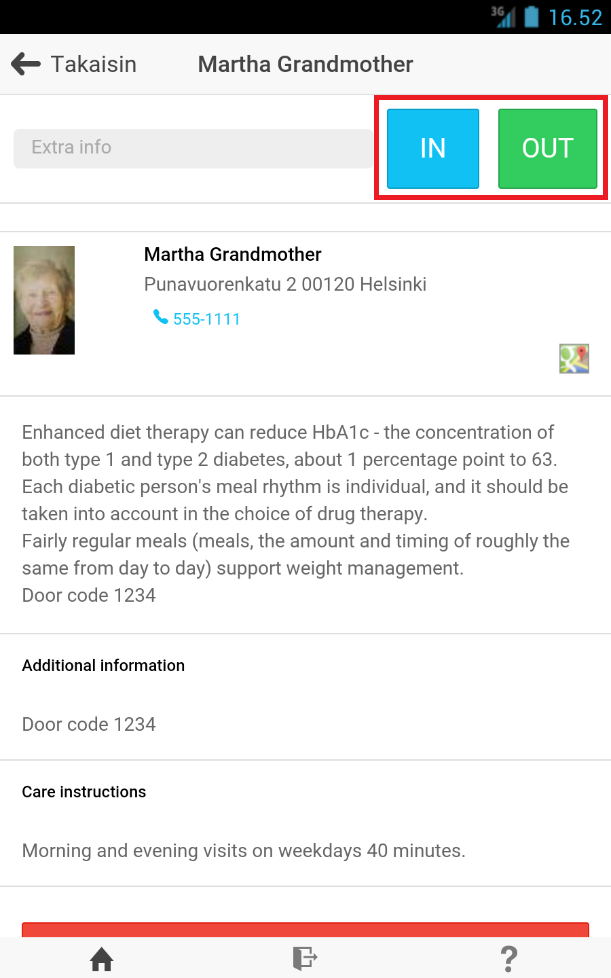
When the employee stamps out, it is adviced to log out from Helper with the Door icon in the bottom of the page.
Customer information
The day's customer information can be browsed in advance by pressing the desired customer on the customer list. This way you can view the customer's detailed information.
Contact information
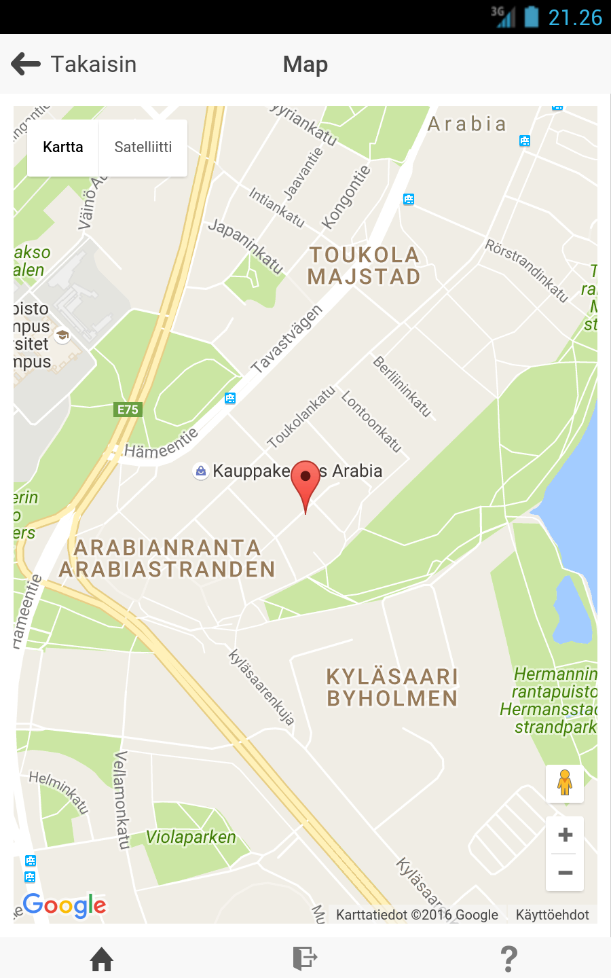
The customer's contact information is on the top part of the page. The customer's location can be viewed on a map with the Map icon.
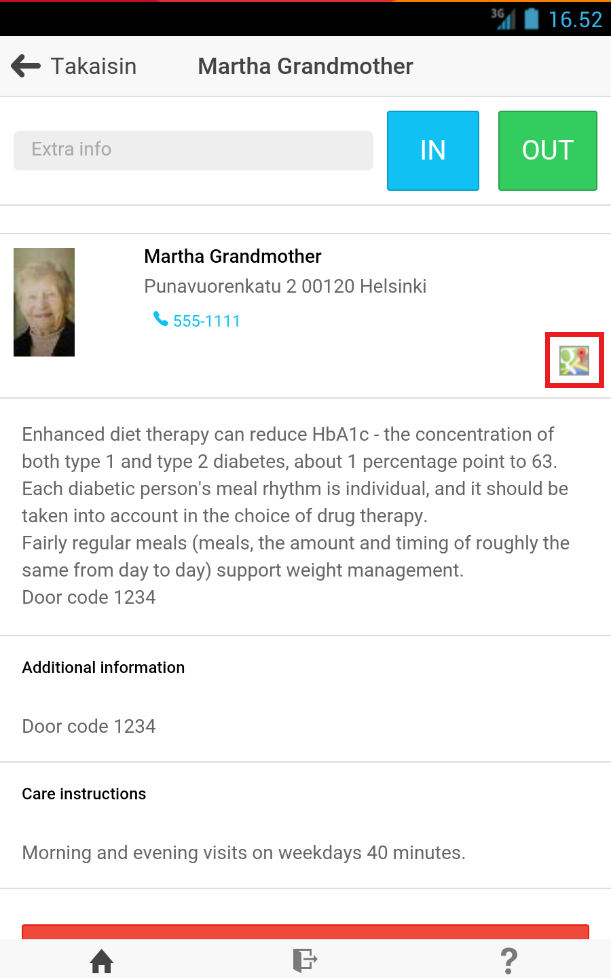
You can use the map to quickly navigate to the customer. You can go back from the map view with the Back button.
Customer information and instructions
After the contact information there are the customer's general information and instructions. These are instructions that the employee needs to know.
Additional information
In the Additional information there are the customer's information that the employee needs to see. Here can be for example the house's door code.
Care instructions
In the Care instructions there are further care guidance that the employee should get to know.
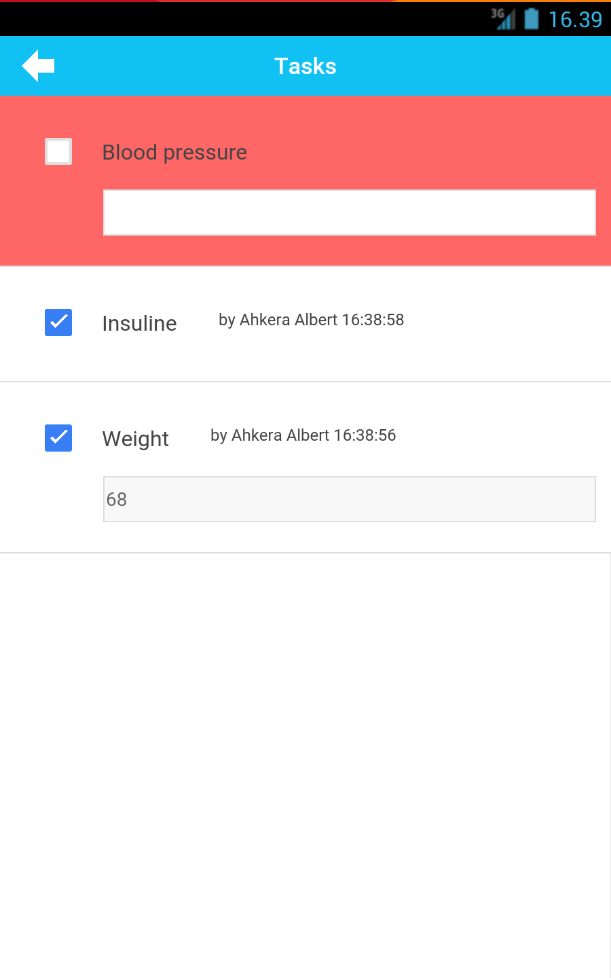
Functions
The Functions have their own buttons. The red color means that the function's task has not been marked as done. Green color means that the task is done. The function's task can be marked as done by opening the function and checking the task's check-box or entering the needed value.
Tasks
In Tasks there are listed the tasks that need to be done during a customer visit. The tasks are marked as done with a check-box or entering a needed value.
Daily tasks
In Daily tasks there are listed the tasks that need to be done on certain days during a customer visit. The tasks are marked as done with a check-box or entering a needed value.
Reporting
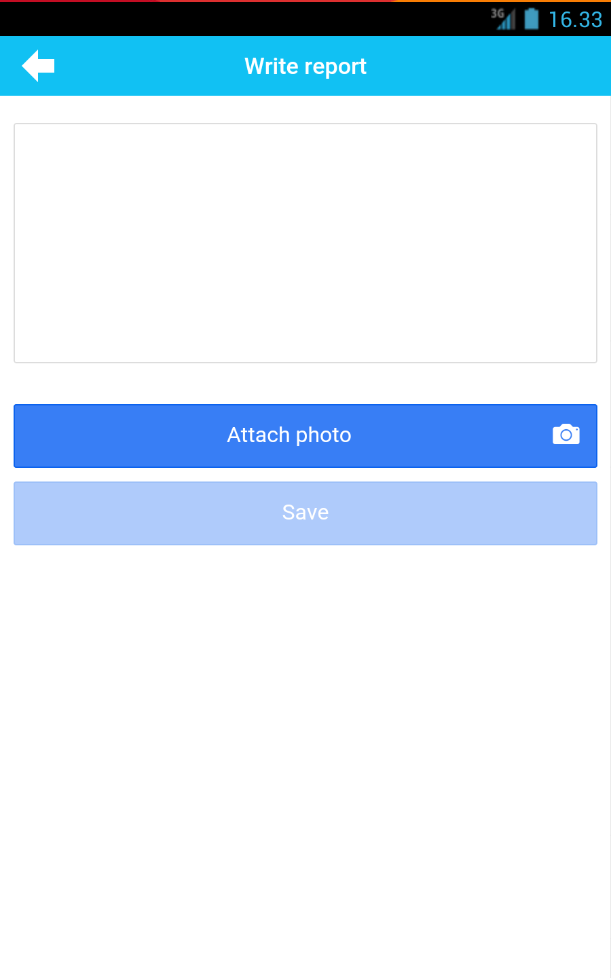
In Reports you can write a report of a customer visit according to the supervisor's instructions.
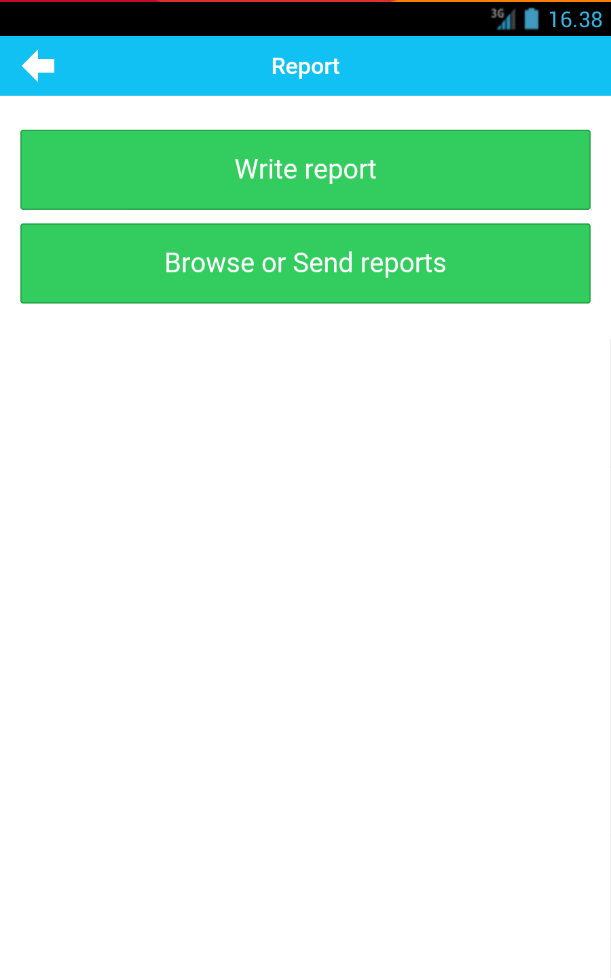
A new report can be written with the Write report button. You are able to attach a photo to the report and it must be saved, so it doesn't get lost. The report can still be modified during the same day.
Reports can be browsed and sent with the Browse and send reports button. To browse the reports you must select a time range of which the reports are fetched with the clock buttons. When the reports have been filtered, you can send a report with the Send button. This opens up a view where you can select the email addresses where the report is sent. Here you can select a contact person or enter an email address. The report can be sent with the Send button.
Contact person
All of the customer's contact persons are listed on the Contact person view. You can call to a contact person just by pressing the phone icon on the person's information.
Reminders
On the bottom there are Reminders. With Reminders you can add notes to a customer's information for example for the next employee that will visit the customer. The reminder is visible under the customer in the customer list.
A new reminder can be added with the + button. This opens up a window where you can write down the reminder, After this save the reminder with the Save button and it will be added to the customer. It can be marked as done with the Done button.